Saturday, January 30, 2021

Buffalo Chicken Baguette Pizzas

You'll want to make pizza every night of the week with this spicy Buffalo Chicken Pizza made on baguettes.  Imagine a pizza done in under 20 minutes!


Buffalo Chicken Baguette Pizzas

If you are a lover of spicy chicken wings then you'll die for these simple to prepare Buffalo Chicken Baguette Pizzas.  Pizzas are quick and easy to make when you are using a prepared crust such as a french baguette.  They make the perfect base for all your toppings.  Today we are making a crowd pleasing pizza that everyone will die for.  

Crispy on the outside and tender on the inside baguettes are topped with shredded chicken that are smothered with buffalo sauce.  Add a little ranch dressing, some mozzarella, and some blue cheese to the mix and you have one heck of a pizza.  These are perfect for the up coming game day celebration, lunch or dinner.  You can also cut these into wedges and serve as appetizers.  Any way you slice them these pizzas will wow your taste buds and having you saying "more please", in less than 20 minutes!


What Ingredients do I need?

  • french baguette
  • shredded chicken
  • buffalo wing sauce (we like Frank's Red Hot Buffalo sauce)
  • ranch dressing
  • mozzarella cheese
  • blue cheese crumbles
  • cilantro
  • scallions


Substitutions and Variations

  • Use shredded beef and BBQ sauce for a BBQ Beef Pizza
  • Use a rotisserie chicken or use chicken thighs
  • A french bread loaf will work instead of a baguette
  • Use Monterey Jack cheese instead of mozzarella
  • Use blue cheese dressing instead of ranch

Kitchen Tips and Notes

  • Use a serrated knife to easily cut your baguette without squishing the bread
  • Watch your bread closely when broiling it, the oven toasts very quickly.
  • If you baguette does not stand up on it's own cut off a piece on the bottom to make it level.
  • Position the baguettes together on the sheet pan to avoid rolling around.
  • Using a silicone brush make spreading the dressing an easier job.


HUNGRY FOR MORE? Subscribe to emails at the top of this page and follow along on Facebook,  and Pinterest for all of the latest updates.


Buffalo Chicken Baguette Pizzas


yeild:  2 pizza loaves


1 french baguette (about 24 inches)
2 cups shredded chicken (rotisserie or pre-cooked roasted)
2/3 cup buffalo wing sauce (ex: Frank's Red Hot Buffalo Wing Sauce)
2-3 Tablespoons Ranch Dressing
1/3 cup shredded Mozzarella cheese
1/2 cup blue cheese crumbles
Toppings:  chopped scallions, and chopped cilantro

Prepare the bread - Turn the oven on Broil and allow it to heat up.  Split 1 baguette in half lengthwise and arrange on a baking sheet with the cut sides up.  Broil until light golden brown, about 2-3 minutes.  Reduce oven to bake at 375 degrees.

In a small bowl combine the chicken and buffalo sauce, mixing until coated.  Set aside.  Spread the ranch dressing over the cut side of both toasted breads and sprinkle evenly with the mozzarella.  Top with the chicken mixture and then sprinkle with blue cheese.

Bake on a sheet pan until cheese has melted and bread is crisp, about 3-5 minutes.  Top with scallions and cilantro.  Cut and serve hot.


Thursday, January 28, 2021

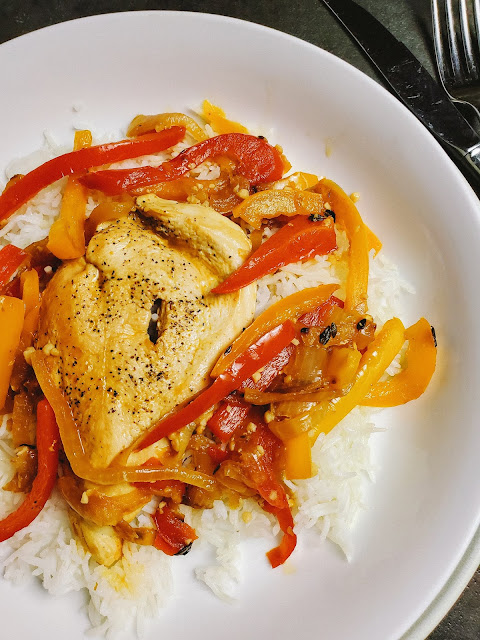
Braised Chicken Breasts with Bell Peppers, Onions & Vinegar

Chicken breasts, bell peppers, and onions braised in a heavenly sauce made with broth and vinegar.  
It's just good classic comfort food.


You just say the word braise and I picture comfort food.  Pot roasts, pork chops, and short ribs all come to mind when I want to braise.  Today we are going to prepare a "one-pot" braised chicken dish that's done on the stove-top which makes this weeknight friendly

What I love most about braising is that it’s so versatile.  In fact, once you’ve mastered the technique, you will never need to use a recipe again. Brown the meat, saute some vegetables, deglaze the pan, and simmer — that really is all you need to know!

Here, seared chicken breasts, 3 colors of bell peppers, and onions are simmered in a heavenly sauce made from chicken broth and white wine vinegar.  The sauce is TO DIE FOR!!!


What Ingredients do I need?

  • olive oil
  • chicken breasts
  • onion
  • garlic
  • thyme
  • paprika
  • red pepper flakes
  • bell pepper
  • white wine vinegar
  • low sodium chicken broth
  • parsley


Substitutions and Variations

  • Use chicken thighs, bone in or boneless
  • Use chicken breasts, bone in
  • Use any chicken pieces you like, legs, wings, or a mixture
  • You could also use this combination with boneless pork chops.
  • Substitute red wine vinegar or balsamic vinegar for the white wine vinegar
  • Use parsley instead of chives
  • Use marjoram instead of thyme
  • Use red onion or shallots for the yellow onion
  • Don't like bell pepper, how about mushrooms, green beans, or zucchini?
  • If you want a crispier chicken dredge the pieces in flour before searing.

Kitchen Tips and Notes

  • Once the chicken braises, the last step is to reduce, reduce, reduce. (the sauce) This final step really concentrates the flavors of the sauce, making it perfect for drizzling over the chicken and dousing over rice. 
  • Use a low-sodium chicken broth to control the salt content
  • Make sure to add the vinegar, it really give the sauce it's flavor punch.
  • Prep all your vegetables and ingredients beforehand to make the dish go quicker.
  • Serve this over rice, mashed potatoes, or pasta.
  • It will stand equally on it's own with a side salad and some crusty bread to sop up that wonderful sauce.


HUNGRY FOR MORE? Subscribe to emails at the top of this page and follow along on Facebook,  and Pinterest for all of the latest updates.


Braised Chicken Breasts with Bell Peppers, Onions & Vinegar 


Serves: 4 • Braising Time: about 30 minutes


1 tablespoon extra-virgin olive oil 
4 boneless skinless chicken breasts 
Kosher salt and freshly ground black pepper 
1 small yellow onion, halved and sliced about ¼" thick 
3 garlic cloves, minced
1 tablespoon chopped fresh thyme 
1 teaspoon paprika
Pinch of crushed red pepper flakes
3 bell peppers -  mixed colors, cored and seeded and cut into strips 
¼ cup white wine vinegar 
¾ cup low-sodium chicken broth 
2 tablespoons chopped fresh parsley 

Season the chicken all over with salt and pepper.  Heat a braising pan or high sided skillet with the olive oil over medium high heat.  When hot add the chicken and sear on both sides until browned, about 5-7 minutes.   Transfer the chicken to a large plate.  

Lower the heat to medium and add the onions and a pinch of salt. Saute, stirring occasionally, until the onions begin to soften, about 5 minutes. Add the garlic, thyme, paprika and red pepper flakes. Stir and cook 30 seconds.  Add the peppers, stirring to mix, and let cook for just a minute or so. 

Add the vinegar, stirring with a wooden spoon and scraping the bottom of the pan to bring up any of the browned bits, deglazing the pan.  Let simmer until much of the liquid has evaporated, about 2 minutes. Add the broth and bring to a simmer.   Return the chicken to the skillet, along with any accumulated juices. Cover, reduce the heat to low, and braise gently for about 30 minutes, turning the chicken over after 15 minutes.  Cook until there are no signs of pink remaining and the chicken reaches an internal temperature of 160 degrees.  

Transfer the chicken to a serving dish.  Increase the heat under the pan to medium-high and boil to reduce the cooking liquid and to concentrate its flavor, about 3 minutes. Check for seasoning and add salt and pepper if necessary. Return the chicken to the pan.   Sprinkle the parsley over the dish and serve hot.


Saturday, January 23, 2021

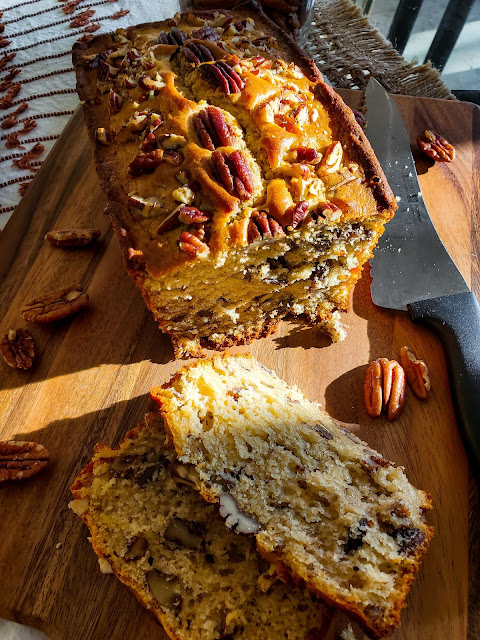
Maple Pecan Bread

Winter breakfast is oh so comforting when you slice into a piece of the most heavenly moist and tender quick bread that's filled with maple goodness and toasty pecans!


Maple Pecan Bread


One of my favorite flavors during the winter months is maple.  It tastes like a buttery golden caramelized sugar and when warm it brings on that comfort feeling.  So this year I couldn't wait to make a quick bread that's filled with maple syrup and my favorite southern pecans.  A warm slice of this breakfast bread slathered with butter (or not) along with a cup of coffee or tea will be a treat you are surely to remember.

Quick breads are bread made without yeast and are easy to pull together in one bowl.  They are made in a loaf pan and cook for about 1 hour so planning ahead is a good idea.  We love a warm slice for breakfast but they are also the perfect afternoon treat, or dessert along with a scoop of ice cream or dollop of whipped cream.  We often take them as dessert for picnics or concerts in the park.


What equipment do I need?


What Ingredients do I need?

  • all purpose flour
  • sugar
  • baking powder
  • baking soda
  • salt
  • buttermilk
  • unsalted butter
  • eggs
  • maple syrup
  • maple flavor 
  • pecans


Substitutions and Variations

  • Walnuts instead of pecans
  • You can use milk, almond milk or soy milk for the buttermilk
  • Use sour cream or full fat yogurt for the butter
  • Add in some dried fruit such as raisins, cranberries, or apricots
  • Substitute half the flour for white whole wheat flour


Kitchen Tips and Notes

  • Use one bowl to mix the batter.  No mixer required
  • Maple flavoring enhances the maple flavor but can be left out
  • Use real maple syrup for the best flavor
  • Do no overmix the batter.  Stir until everything just comes together.  Overmixing will result in a dense tough bread.
  • Allow the bread to cool in the loaf pan for 10 minutes before trying to remove it.  Run a knife along the edges prior to releasing.
  • Make sure to grease the loaf pan with either non-stick cooking spray or butter to ensure easy removal.
  • To avoid over-browning you may place a sheet of tented foil over the top of the loaf.  I would check for browning around the 45 minutes mark.
  • Store the bread in plastic wrap for several days.  You may also freeze the bread for up to 3 months.


HUNGRY FOR MORE? Subscribe to emails at the top of this page and follow along on Facebook,  and Pinterest for all of the latest updates.


Maple Pecan Bread


yield:  1 loaf


1/2 cup buttermilk
8 tablespoons unsalted butter, melted
2 large eggs
1/2 cup maple syrup
1/2 teaspoon maple flavor 
2 1/2 cups all purpose flour
1/2 cup sugar
1 teaspoon baking powder
1/2 teaspoon baking soda
1 teaspoon salt
1 1/2 cups chopped pecans

Preheat the oven to 350°F. Grease a 9" x 5" loaf pan with non-stick cooking spray or butter.

In a large bowl, whisk together the buttermilk, melted butter, eggs, maple syrup, and maple flavor. Add the dry ingredients, flour, sugar, baking powder, baking soda, and salt to the bowl.  Stir just until the mixture is combined.  Fold in the pecans.

Spoon the batter into the prepared loaf pan. Bake until the top of the loaf is golden brown and a knife inserted in the center comes out clean, 60 to 70 minutes.  

Remove from the oven and cool in the pan on a rack for 10 minutes before removing from of the pan. Once removed from the pan plan on a wire rack to cool prior to slicing.  


Additional Quick Breads you might like:

Monday, January 18, 2021

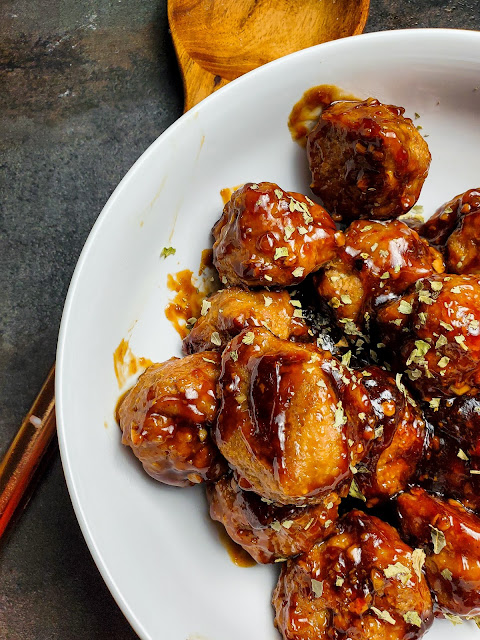
Weeknight Wonder: Mongolian Meatballs

Moist and tender turkey meatballs doused in a sweet and spicy sticky glaze.  Served over some fluffy rice and you have a quick dinner in under 45 minutes!


Mongolian Meatballs


Pinterest is the best place to find something new to make for dinner.  This is one of my "must try" pins that appealed to me as an easy weeknight meal.  Who doesn't love meatballs??  And these are even more appealing since they are not your ordinary Italian meatball but an Asian version.

I made these with turkey instead of beef to cut down on the fat and baked them instead of frying them, again to make them healthier.  These little meatballs came out wonderful!  The sauce is sweet and spicy and oh so sticky.  The perfect glaze over the well seasoned meatballs and on top of a bed of fluffy rice.  Heaven!  They will be on the table in under 45 minutes and are very easy to make.   So make sure to stock up on some Asian condiments and get cooking!


What do I serve the meatballs with?

  • Fluffy sticky rice
  • Asian noodles
  • Green steamed vegetables such as broccoli or green beans
  • On top of a salad

What Ingredients do I need?

  • ground turkey
  • bread crumbs
  • egg
  • ginger
  • garlic
  • soy sauce
  • red pepper flakes
  • hoisin sauce
  • sesame oil or canola oil
  • brown sugar
  • sriracha
  • cornstarch
  • cilantro


Substitutions and Variations

  • Use ground beef, pork or chicken, instead of the ground turkey
  • This would be great on top of a salad
  • Make the meatballs a little larger and stick a toothpick inside for great appetizers
  • Serve them on slider buns for Asian Meatball sliders, great for Game Day!
  • Fry the meatballs instead of baking them.
  • Leave out the red pepper flakes and any sriracha


Kitchen Tips and Notes

  • Meatballs are freezer friendly.  You can either freeze them unbaked by flash freezing or after they have been baked but do not put the glaze on them.  They will keep in the freezer 3 months.
  • A cookie scoop makes quick work in forming the meatballs. I use this one.
  • If forming by hand wet your hands a little first to avoid the meat mixture from sticking to your fingers.
  • The sauce may be made in a wok, large skillet, or a medium sauce pan.


HUNGRY FOR MORE? Subscribe to emails at the top of this page and follow along on Facebook,  and Pinterest for all of the latest updates.


Mongolian Meatballs


yield:  18 meatballs


For the Meatballs:
1 lb. ground turkey, 7% fat
⅓ cup bread crumbs
1 egg
1 tablespoon minced ginger
1 tablespoon minced garlic
1 tablespoon soy sauce
1 teaspoon red pepper flakes 
½ teaspoon salt
¼ teaspoon black pepper


For the Mongolian Sauce:
1 tablespoon sesame oil
1/2 tablespoon minced garlic
2 tablespoon hoisin sauce
1/4 cup brown sugar
3 tablespoon soy sauce
1 tablespoon sriracha sauce 
1/2 tablespoon minced ginger

OTHER
1 tablespoon cornstarch 
1/4 cup water 
cilantro, chopped as garnish

Preheat oven to 350 degrees.

In a large bowl add the ground turkey, breadcrumbs, egg, ginger, garlic, soy sauce, red pepper flakes, salt and pepper.  Gently mix all the ingredients until everything is well combined.  Do not handle the meat very much.  Over mixing will result in dense tough meatballs.  Roll out the meatballs using a small cookie scoop into 1 or 1 1/2" meatballs.  Place them on a baking sheet, spacing them about 2 inches apart.  Place them in the refrigerator to firm up for about 10 minutes.  

Bake the meatballs in the oven for 15-20 minutes until cooked through and browned.  Remove from oven.

Meanwhile start on the sauce.  Heat a wok or skillet over medium heat.  Add the sesame oil and heat.  Add the rest of the sauce ingredients and stir to combine.  Bring to a boil over high heat and then reduce the heat to low and simmer for 2 minutes.  Combine the cornstarch and the water to a small bowl and whisk together to create a slurry.  Add the slurry to the sauce and cook until thickens, stirring often, about 2-3 minutes.  Sauce will become translucent.  

Add the meatballs, tossing to coat.  
Allow meatballs to heat thoroughly in the sauce.  Sprinkle with cilantro.    Serve.


adapted from Food52


Saturday, January 16, 2021

Cranberry Citrus Salad

A show-stopper salad that takes advantage of winter produce.  Filled with cranberries and oranges this salad will brighten up any meal!


Cranberry Citrus Salad


I love a really good salad.  This one uses produce found during the winter months and is a great side salad to all types of meat.  The presentation is outstanding on this salad and is completely company worthy but also perfect for the crowd at home.  I served this on Christmas Day and found that is was actually my favorite dish of the whole meal.  It's that good!

A light and fresh salad that is bursting with tart fresh cranberries and sweet juicy Cara Cara oranges.  You also get a little bite from some red onion, and crunch from the celery.  All of this sits a top of a bed of spicy arugula and is sprinkled with some mint for another pop of freshness.  This is one heck of a salad!


What goes with this salad?


What Ingredients do I need?

  • fresh cranberries
  • Cara Cara oranges
  • celery
  • red onion
  • sugar
  • lemon juice
  • ginger - i used pureed ginger
  • arugula
  • fresh mint - this really makes the dish
  • olive oil


Substitutions and Variations

  • Use Navel oranges instead of Cara Cara
  • Use escarole or red leaf lettuce instead of arugula
  • I would use fresh cranberries if available.  Frozen cranberries will work too, just be sure to thaw them
  • don't like mint?  leave it off
  • use shallot instead of red onion
  • add sunflower seeds for added crunch
  • Blood oranges would work nicely as a substitution


Kitchen Tips and Notes

  • Start this salad earlier in the day. The cranberry topping need to meld together for 1 hour before serving.
  • A food processor makes quick work of chopping the cranberries.  Use the pulse feature.
  • If you don't like a really strong onion flavor cut them and place them in cold water for 15 minutes.  This will cut down on the bite of the onion.
  • Cutting segments from an orange is called supreme.  This process gets rid of the membranes between the segments and any bitter white pith. You will end up with prettier and tastier fruit slices.  YouTube has videos on how to do this technique.


HUNGRY FOR MORE? Subscribe to emails at the top of this page and follow along on Facebook,  and Pinterest for all of the latest updates.


Cranberry Citrus Salad


serves 4

1 cup fresh cranberries
2 Cara Cara oranges
1/2 cup celery, sliced
1/4 cup red onion, diced
2 Tablespoons sugar
1 Tablespoon fresh lemon juice
1/2 teaspoon fresh ginger, grated
3 cups arugula
2 Tablespoon fresh mint, chopped
1 Tablespoon olive oil

In a food processor add cranberries and pulse 5 times to coarsely chop, or chop by hand.  Transfer to a bowl.  Cut peel from the oranges making sure that there is no with pith left on the orange.  Cut sections from the orange over the bowl with the cranberries to catch any juice.  Add sections to the cranberries.  Add the celery, onion, sugar, lemon juice, and ginger.  Stir to combine.  Cover and refrigerate at least 1 hour.

In a medium bowl toss arugula with the mint and the oil.  Place on a platter and top with the cranberry orange mixture.  Serve.  


adapted from BHG.com


Friday, January 15, 2021

Cranberry Orange Muffins - Small Batch

Wonderful bakery style muffins bursting with the sweet tart flavors of fresh cranberries and bright orange citrus.  The perfect winter breakfast treat!


Cranberry Orange Muffins


If you follow me then you know that MGG and I love our weekend breakfasts.  Since the pandemic has started baking has become a weekly pleasure.  The other day MGG was talking about how he misses Trader Joe's since he hasn't been in 10 months.  He mentioned a particular item, Cranberry Orange Bread, that was discontinued quite a while back.  He asked me to make him some because he loved it so much.  I was more than happy to oblige!  At first I was set on making a quick bread but then due to the cooking time (50-60 minutes) I decided to make muffin instead since he was hovering around the kitchen waiting to start cooking breakfast.  


Muffins only take 18-20 minutes to bake so they are a quicker item to throw together when the crowd is starving!  Not only are muffins great for breakfast or brunch, they are perfect for grab and go snacks, as well as a sweet with coffee or hot tea.  These muffins in particular use fresh cranberries that give you a bite or tartness and are filled with orange flavors from juice, zest, and a bit of orange extract.  Orange and cranberry are one of those perfect combinations like peanut butter and jelly, that just go together.  These muffins will leave you warm and satisfied, and possibly reaching for the next one!


What Ingredients do I need?

  • eggs
  • milk
  • orange juice
  • canola oil
  • flour
  • sugar
  • baking powder
  • salt
  • orange zest
  • orange extract - optional
  • fresh cranberries - you can use dried if you like but they won't give you as much flavor as fresh.  In the winter I buy bags of fresh cranberries and freeze them!


Substitutions and Variations

  • Walnuts, almonds, or pecans would be a good addition
  • You can leave out the extract, or use vanilla if you like
  • Store bought orange juice works well in this recipe
  • Dried cranberries will work but will not provide as much freshness or tartness.
  • Dried cherries can be substituted for the cranberries
  • Gluten free flour may be substituted
  • Sugar substitutes may be used instead of sugar
  • Use sour cream, yogurt, or buttermilk instead of milk


Kitchen Tips and Notes

  • 1st rule of them when making muffins is not to "overmix" the batter.  You want it batter to just come together.  Little spots of flour is okay.
  • To get high muffin tops turn your oven up to 400 degrees.
  • Make sure you are using fresh baking powder.  To test put 1/2 teaspoon into 1/4 cup of boiling water.  If it bubbles, you are good.
  • Purchase a 6 well muffin tin for small batches
  • Double the recipe for 12 muffins
  • Muffins can be frozen individually and kept for 3 months


HUNGRY FOR MORE? Subscribe to emails at the top of this page and follow along on Facebook,  and Pinterest for all of the latest updates.


Cranberry Orange Muffins


yield:  6 muffins


1 egg, beaten
1/4 cup milk
1/4 cup orange juice
1/4 cup canola oil
1/2 teaspoon orange extract
1 1/2 cups flour
1/2 cup sugar
1 teaspoon salt
2 teaspoons baking powder
2 teaspoons orange zest
1/2 cup fresh cranberries, rough chopped

Preheat your oven to 400 degrees.  Spray a 6 well muffin pan with cooking spray and set aside.

To a large bowl add the egg, milk, orange juice, canola oil, and orange extract.  Whisk to combine.  Add the flour, sugar, salt, baking powder, and orange zest to the bowl.  Stir until just combined.  Do not overmix.  Fold in the chopped cranberries.

Using a large cookie scoop, distribute the batter evenly among the 6 muffin wells.  Place in the oven and bake for 18-20 minutes until the tops are golden brown and set.  Remove from the oven and allow to cool in the pan for 10 minutes.  Remove from the pan and allow to cool on a wire rack.  Serve.


Other Muffin recipes you may like:


Saturday, January 9, 2021

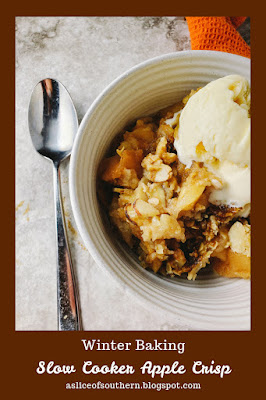
Slow Cooker Apple Crisp

Have dessert ready when you are by making this Slow Cooker Apple Crisp.  It's filled with warm cinnamon apples and topped with a crunchy oat topping that's perfect with a scoop of vanilla ice cream.


Slow Cooker Apple Crisp


During the winter we love the abundance of apples that are in season and eat them in a variety of ways.  One of my favorites is to eat them for dessert as in apple pie, or apple crisp.  Today's version is cooked in the slow cooker.  This allows you to be hands free and dessert will be ready when you are.  Love that!

Perfect with a scoop of vanilla ice cream, warm apples coated in toasty cinnamon are topped with a crunchy almond oatmeal brown sugar mixture that make this dessert irresistible.  Make sure to ready the tips as I have a trick for you so the topping doesn't get all soggy.


What do I need to make apple crisp?

What Ingredients do I need?

  • apples (I chose 4 granny smith and 4 Jazz apples for flavor variety)
  • lemon juice (helps the apples from turning brown)
  • brown sugar (light or dark)
  • cinnamon (good quality cinnamon)
  • oatmeal
  • sliced almonds
  • flour
  • butter


Substitutions and Variations

  • substitute chopped pecans for the almonds (I typically use pecans in my crisps but wanted to change it up a bit)
  • use coconut oil instead of butter to make this vegan
  • use a variety of apples instead of just granny smith.  Jazz, envy, honeycrips, braeburn, and cortland are all good baking apples.
  • Serve this with ice cream
  • Drizzle with caramel
  • Serve this as a hot breakfast (do I dare??)
  • Substitute pears for apples
  • Add cranberries to the apple mixture
  • Add blueberries to the apple mixture

Kitchen Tips and Notes

  • To keep the topping from getting soggy, place several paper towels over the slow cooker and then place the lid on it.  This will catch the moisture that develops.
  • Use a good cinnamon since it is the star of the show
  • Use ripe firm cooking apples
  • Cook on high 3-4 hours or low 6-8 hours


HUNGRY FOR MORE? Subscribe to emails at the top of this page and follow along on Facebook,  and Pinterest for all of the latest updates.


Slow Cooker Apple Crisp


serves 6-8

8 apples, peeled, cored and thinly-sliced
(I used a mixture of Granny Smith and Envy)
1 tablespoon lemon juice
1/3 cup packed brown sugar
2 teaspoons ground cinnamon
1 cup old-fashioned oats
2/3 cup sliced almonds
1/2 cup flour
1/3 cup brown sugar
1 teaspoon ground cinnamon
4 tablespoons melted butter

In a large mixing bowl add peeled, cored, and sliced apples.  Sprinkle with lemon juice and toss to coat. Sprinkle the brown sugar and cinnamon and toss until evenly coated.   Pour the entire mixture into the slow cooker insert, making sure the apples are spread our evenly.  

In a medium bowl add the oats, almonds, flour, sugar, and cinnamon.  Mix to combine.  Drizzle the melted butter over the mixture, and then stir until well coated.  Top the apples with the oat mixture, trying to cover most of the apples.

Place several paper towels on top of the slow cooker, and place the lid on top.  Cook on high for 3-4 hours, or on low for 6-8 hours until the apples are soft and easily pierced with a knife.  Serve in individual bowls with ice cream if desired.


LinkWithin

Related Posts Plugin for WordPress, Blogger...