Showing posts with label picnic. Show all posts

Tuesday, June 16, 2026

Italian Picnic Sandwich for a Crowd


Italian Picnic Sandwich for a Crowd is an easy make-ahead sandwich loaded with Italian deli meats, fresh mozzarella, basil, tomatoes, artichokes, and greens. Perfect for summer picnics, beach days, pool parties, and feeding a crowd without turning on the oven.


Italian Picnic Sandwich for a Crowd 


Summer is the season of feeding people without heating up the kitchen.

Whether it's a beach day, lake trip, backyard gathering, concert in the park, road trip lunch, or an afternoon by the pool, I always find myself looking for recipes that can feed a group without requiring hours of prep or standing over a hot stove. During the hottest days of summer, recipes that don't require turning on the oven are worth their weight in gold. That's exactly where this Italian Picnic Sandwich for a Crowd comes in.

Layered with Italian deli meats, fresh mozzarella, basil, tomatoes, marinated artichokes, and crisp greens, it's the kind of sandwich that feels special while being incredibly easy to assemble. Everything can be prepared ahead of time, making it perfect for entertaining, road trips, picnics, and casual summer weekends.

One of my favorite things about this sandwich is how beautiful it looks when sliced and served. The colorful layers make it feel like something you'd find at a neighborhood Italian deli, yet it comes together with simple ingredients from the grocery store.

Around here, summer isn't just a season—it's a collection of beach days, backyard dinners, poolside afternoons, and impromptu gatherings with friends. Having a few reliable recipes that can feed a crowd without heating up the kitchen makes those moments even easier to enjoy.

Enjoy!


-- Ingredients

  • A large bakery-style French loaf or Italian loaf - Choose a sturdy loaf that can hold generous layers of fillings without becoming soggy.
  • olive oil
  • garlic cloves
  • deli meats - cotto or hard salami, mortadellasliced turkey breast, and slice chicken breast
  • fresh mozzarella
  • fresh basil leaves
  • Roma tomatoes
  • marinated artichoke hearts
  • fresh spinach leaves
  • red onion
  • seasonings - kosher salt, freshly ground black pepper, and Italian seasoning


-- Equipment

  • Serrated bread knife
  • Cutting board
  • Small mixing bowl
  • Pastry brush
  • Measuring spoons
  • Serving platter


My Go-To's

Serrated Bread Knife - A quality bread knife makes slicing the loaf cleanly and helps preserve all those beautiful layers.

Large Wooden Cutting Board - Provides plenty of space for assembling and slicing the finished sandwich.

Serving Platter (wood or porcelain) - A large platter makes this sandwich look party-ready the moment it hits the table.


-- Let's Make It Together

Slice the loaf horizontally and gently remove some of the soft interior bread from both halves.

Stir together the olive oil and garlic, then brush the mixture over the cut sides of the bread. Sprinkle with Italian seasoning.

Layer half of the salami, mozzarella, basil, tomatoes, mortadella, artichokes, spinach, turkey, onion, and chicken on the bottom half of the loaf. Repeat the layers once more.

Season lightly with salt and pepper, then place the top half of the bread over the fillings.

Slice into wedges and serve immediately, or wrap and refrigerate until ready to serve.


-- Perfecting the Cooking Process

Because there is no cooking involved, ingredient quality really matters here. Fresh mozzarella, ripe tomatoes, and good-quality deli meats will make a noticeable difference. If making the sandwich ahead of time, place the greens between the tomatoes and bread to help prevent excess moisture from soaking into the loaf.


-- Add Your Touch

One of the reasons I return to this sandwich all summer long is how easy it is to adapt for different occasions. Whether you're packing lunch for a day at the beach or lake, feeding friends at a backyard gathering, or preparing food for a road trip, this recipe can be customized to fit the moment.

  • Add roasted red peppers
  • Swap spinach for arugula
  • Use provolone instead of mozzarella
  • Add pepperoncini for extra zing
  • Include prosciutto for a more traditional Italian deli flavor
  • Press the sandwich for 30 minutes before serving for a classic deli-style presentation


-- Set the Mood 

Part of the joy of cooking is creating a little moment around the meal. Here are a few simple ways to set the mood when serving this dish.


This Italian Picnic Sandwich for a Crowd is one of my favorite ways to feed people during the summer without turning on the oven. Whether we're headed to the beach, packing for a road trip, go to a concert in the park, or hosting friends in the backyard, it's the kind of recipe that makes entertaining feel effortless.

If you're planning summer gatherings, you may also enjoy my Mixed Berry Galette with Lemon & Vanilla, Sheet Pan Burrata Gnocchi with Roasted Peppers & Basil, Eggplant & Chicken Sandwiches, and Creamy Coconut Fruit Dip. Together, they make a wonderful collection of warm-weather recipes perfect for sharing with family and friends.

Whether you're headed to the beach, the park, or your own backyard, I hope this sandwich finds its way into your summer plans.


Before You Start

What occasions is this sandwich best for?
This sandwich is perfect for picnics, beach days, pool parties, road trips, concerts in the park, tailgates, and casual summer entertaining.

Can I make this ahead of time?
Yes. It can be assembled several hours ahead and refrigerated until serving.

Can I press the sandwich?
Absolutely. Wrapping and lightly pressing the sandwich creates a more traditional deli-style picnic sandwich.

What bread works best?
A sturdy bakery-style French loaf or Italian loaf works best.

Can I customize the meats?
Yes. Use your favorite deli meats or whatever you have available.

How long will leftovers keep?
Store covered in the refrigerator for up to 2 days.

Can I serve this for a party?
Definitely. It's ideal for feeding a group and works well on buffet tables.


Saturday, May 2, 2026

Mediterranean Quinoa Salad (Fresh & Flavorful)


This Mediterranean Quinoa Salad is fresh, colorful, and full of bright flavor. Made with crisp vegetables, chickpeas, quinoa, and a lemon herb dressing, it’s the perfect healthy summer salad for meal prep, cookouts, or easy lunches.


Mediterranean Quinoa Salad (Fresh & Flavorful)


This is the kind of salad that disappears fast at summer gatherings.

It’s bright, colorful, fresh, and somehow manages to feel both light and satisfying at the same time. The quinoa gives it heartiness, the vegetables keep it crisp and refreshing, and the lemon herb dressing pulls everything together with bold fresh flavor.

I especially love this recipe because it works for almost everything—meal prep lunches, backyard dinners, cookouts, or as an easy side dish alongside grilled chicken or kabobs. It’s one of those versatile recipes that tastes even better after it sits for a little while, making it perfect for warm weather entertaining.

Enjoy!


Ingredients

  • Quinoa — adds protein, texture, and makes the salad extra satisfying
  • Red bell pepper — brings sweetness and beautiful color
  • English cucumber — crisp, refreshing, and perfect for summer salads
  • Grape tomatoes — juicy bursts of freshness throughout the salad
  • Red onion — adds sharpness and balance
  • Chickpeas — hearty, filling, and packed with texture
  • Olive oil — forms the rich base of the dressing
  • Fresh lemon juice — keeps everything bright and fresh
  • Red wine vinegar — adds tang and depth
  • Fresh parsley — gives the salad a vibrant Mediterranean flavor
  • Garlic — adds bold savory flavor to the dressing
  • Salt — helps bring all the flavors together


Equipment

  • Medium saucepan
  • Fine mesh strainer
  • Large mixing bowl
  • Cutting board and knife
  • Small whisk or fork for dressing


My Go-To Tools


-- Let’s Make It Together

Rinse the quinoa well and cook according to package directions. Let cool slightly while preparing the vegetables.

Dice the bell pepper, cucumber, and red onion, then halve the tomatoes.

In a small bowl, whisk together the olive oil, lemon juice, red wine vinegar, parsley, garlic, and salt.

Add the quinoa, vegetables, and chickpeas to a large bowl. Pour over the dressing and toss until everything is evenly coated.

Serve immediately or chill for a bit to let the flavors blend together.


-- Perfecting the Cooking Process

The biggest key to great quinoa salad is texture. Rinsing the quinoa well removes bitterness, while allowing it to cool slightly before mixing helps keep the vegetables crisp and fresh instead of softening them.


-- Add Your Touch

This salad is incredibly flexible depending on the season or what you have in the fridge.

Add feta cheese for a creamy salty bite, avocado for richness, or grilled chicken for extra protein. Fresh herbs like basil or dill also work beautifully if you want to change the flavor profile slightly.


Set the Mood 

A good meal deserves a great setting. Here are a few easy ways to set the mood when serving this dish.


If you’re building an easy summer menu, these recipes pair perfectly with this Mediterranean quinoa salad:

Whether you’re meal prepping lunches for the week or planning a backyard dinner with friends, this salad is one of those fresh summer recipes you’ll come back to again and again.


Before You Start 

Do I need to rinse quinoa first?
Yes. Rinsing removes the natural coating that can taste bitter.

Can I make this ahead of time?
Absolutely. This salad tastes even better after chilling for a few hours.

How long does it keep?
Stored in an airtight container, it keeps well for 3–4 days in the refrigerator.

Can I add protein?
Yes. Grilled chicken, shrimp, or salmon work wonderfully.

Can I serve this warm?
You can, but it’s best slightly chilled or at room temperature for the freshest flavor.


Tuesday, July 1, 2025

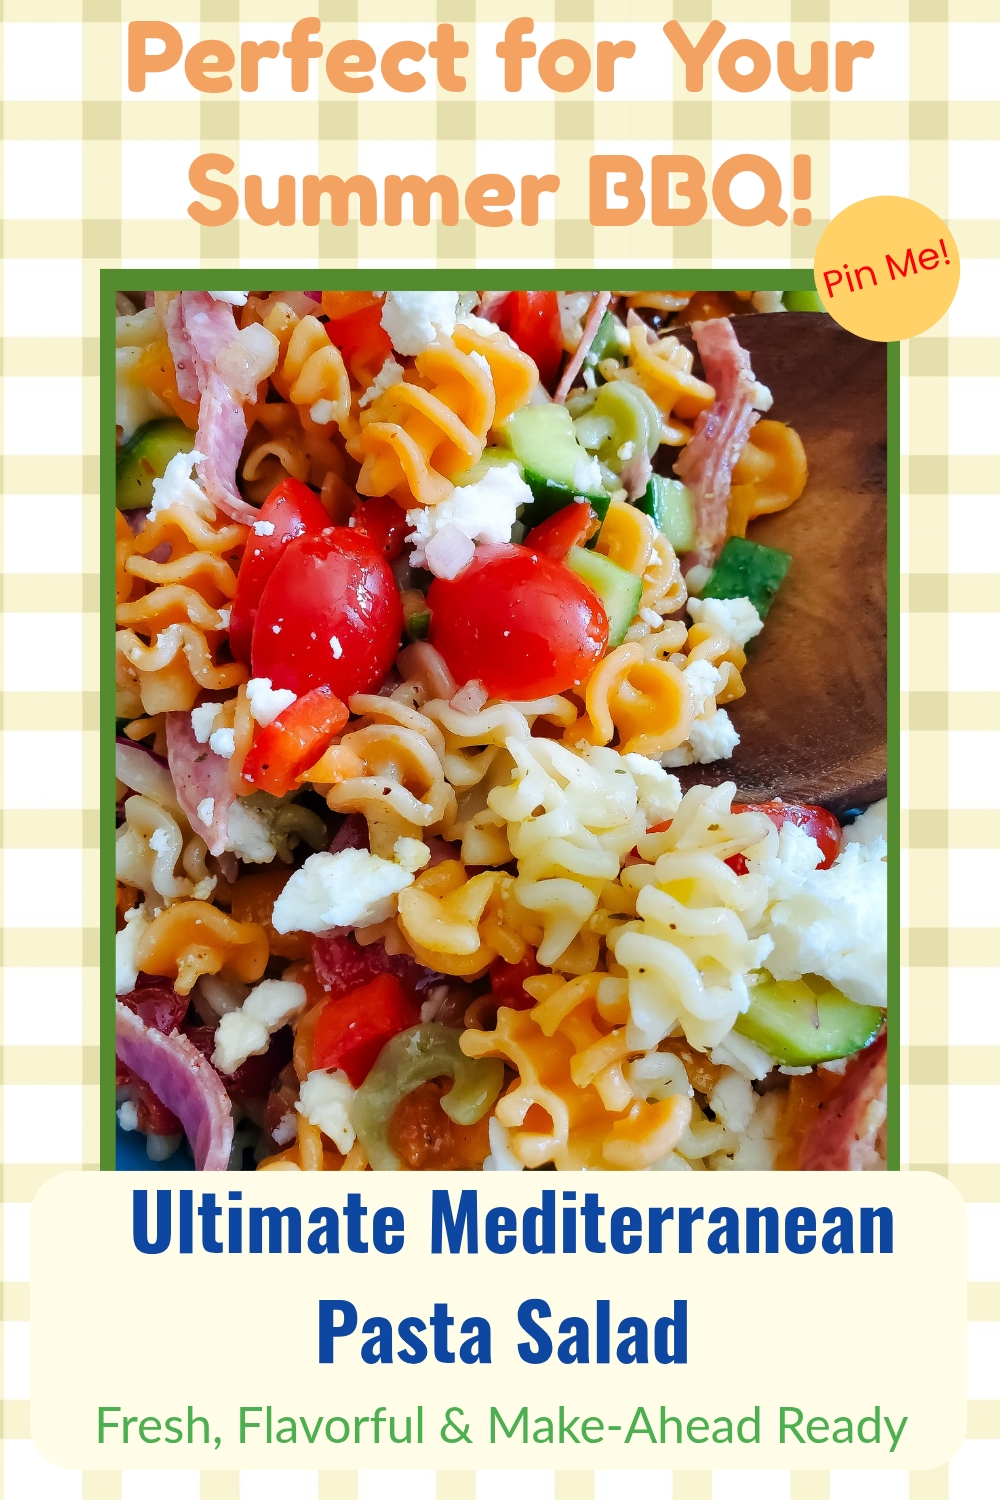
Ultimate Mediterranean Pasta Salad – Easy Side Dish for BBQs & 4th of July

This Ultimate Mediterranean Pasta Salad is the perfect easy make-ahead side dish for BBQs, potlucks, and 4th of July celebrations—fresh, zesty & crowd-pleasing!


Ultimate Mediterranean Pasta Salad – Easy Side Dish for BBQs & 4th of July


Every year, as the 4th of July rolls around, I find myself reaching for recipes that are bright, bold, and built for sharing. You know the ones—dishes that hold their own at the cookout table, that can chill in the fridge while you chase sparklers or man the grill, and still wow everyone when it’s time to eat. This Ultimate Mediterranean Pasta Salad is that dish.

It’s become my go-to for summer gatherings: a colorful, crave-worthy mix of tender rotini, juicy tomatoes, crunchy cucumbers, sweet peppers, and salty bites of feta and salami. But what really ties it together? A zesty lemon-herb dressing with a touch of honey, sumac, and paprika—it’s bold, tangy, and completely irresistible. Whether you're heading to a 4th of July potluck, planning a backyard BBQ, or just want a make-ahead meal that brings the sunshine, this pasta salad checks every box.

Enjoy!


What Ingredients do I need?


Pantry/Dry Goods

Deli/Cheese
  • Feta cheese (crumbled)
  • Beef Genoa salami (sliced or stick-style)

Produce
  • Cherry or grape tomatoes
  • Persian cucumbers
  • Orange bell pepper
  • Red bell pepper
  • Small red onion
  • Fresh basil
  • Lemons (for juice and zest)


Substitutions and Variations

Substitutions

  • Pasta:  Instead of rotini: Fusilli, penne, farfalle, or cavatappi
  • Cherry or Grape Tomatoes:  Chopped Roma or vine tomatoes (remove excess juice/seeds)
  • Persian Cucumbers:  English cucumber (peeled if preferred) or regular cucumber (remove seeds)
  • Orange & Red Bell Peppers:  Any bell pepper color or use roasted red peppers for a smoky flavor
  • Red Onion:  Shallots (milder) or sweet yellow onion (thinly sliced)


Variations

  • Vegetarian Delight:  Omit the salami and add chickpeas or white beans for protein.  Toss in kalamata or green olives for a salty punch.
  • Herb Garden Twist:  Swap basil with a mix of mint, parsley, and dill for a fresh, herby take.  Add a sprinkle of lemon zest just before serving for brightness.
  • Grain Swap:  Swap pasta with orzo, couscous, quinoa, or farro for a different texture or a gluten-free option.


Kitchen Tips and Notes

  • Cook pasta just to al dente: Slightly firm pasta holds up better once chilled and tossed in dressing—no mushy bites here!
  • Use the good olive oil: Since the dressing is raw and lemon-forward, a high-quality extra virgin olive oil makes a big difference in flavor.
  • Toss dressing just before serving (if prepping ahead): This keeps the salad vibrant and prevents sogginess. Or reserve a few spoonfuls to refresh the salad right before serving.
  • Double the dressing: It keeps well in the fridge for up to a week and tastes great drizzled on grilled chicken, veggies, or even grain bowls.

  • Store in an airtight container in the fridge for up to 3–4 days. The flavors will deepen as it rests!

  • Freshen it up before serving: Pasta can absorb dressing as it sits, so revive it with a splash of olive oil, lemon juice, or a spoonful of leftover dressing.


🔥BBQ Hosting Tips – Stress-Free, Crowd-Pleasing, and Fun

Throwing a backyard BBQ doesn’t have to mean sweating over the grill all day or scrambling at the last minute. With a little prep and a few smart hosting tricks, you can enjoy the party right along with your guests. Here are some of my go-to tips for effortless and memorable summer gatherings:

1. Prep Sides the Day Before:  Make-ahead dishes (like this Mediterranean pasta salad!) are lifesavers. Cold salads, dips, and marinated veggies can all be prepped a day in advance, saving you time and fridge space on party day.

2. Keep Drinks Cold & Easy to Grab:  Fill a cooler or drink tub with ice and stock it with sparkling water, lemonade, sodas, and maybe a signature mocktail or punch. Label it clearly and station it away from the cooking zone to avoid crowding the grill.

3. Plan a Simple, Grilled Main Dish:  You don’t need five kinds of meat. Choose 1–2 main proteins—like burgers and chicken—or go plant-based with grilled veggie skewers or portobello mushrooms. Simpler menus = happier hosts.

4. Create a Serve-Yourself Station:  Set up a buffet-style layout where guests can build their own plates. Include condiments, toppings, utensils, and napkins in one place so people don’t have to ask (or interrupt you) mid-flip.

5. Add Ambience with Music & Lighting:  A fun playlist and a few strings of patio lights or lanterns can instantly elevate the atmosphere. Bonus: citronella candles or herbs like rosemary and mint can help keep bugs at bay while setting the mood.

6. Prep for Clean-Up Ahead of Time:  Place labeled bins for recycling, and trash where guests can find them easily. Keep a stash of wet wipes and paper towels nearby—you’ll thank yourself later.

Bonus: Don’t Try to Do It All:  Let guests bring drinks, dessert, or chips. Most people want to help, and it makes the party feel more relaxed and communal.


HUNGRY FOR MORE? Subscribe to emails at the top of this page and follow along on Facebook,  and Pinterest for all of the latest updates.


Thursday, June 1, 2023

Ham and Swiss Sliders

These scrumptious Ham and Swiss Sliders are so melty and gooey, yet easy to make for all your gatherings.


Ham and Swiss Sliders


It's the season of summer gatherings; graduation parties, baby showers, pool parties, picnics, game day, potlucks and BBQs.  Sliders are the perfect finger food that can be an appetizer, or the main meal, and work for any gathering.

Ham and swiss are iconic flavors and when you serve it hot and I'm in heaven with that melty cheese.  So these are right up my alley.  I've even made these for lunch on the weekend, (adjusting the quantity) just for me and my husband (pictures are from our weekend lunch).  You've gotta change up the plain old sandwich sometimes!

This one has a mix of spicy brown mustard and mayo to accompany the ham and cheese, and it's served on dinner rolls that are topped with a savory butter, garlic mixture.  The topping takes these slider over the top with flavor!  Easy to assemble and then pop them in the oven to melt the cheese and heat up that topping.  Yum!  I'm ready to make another batch just thinking about them.

Enjoy!


What Ingredients do I need?

  • dinner rolls
  • spicy brown mustard
  • mayonnaise
  • sliced deli ham
  • sliced Swiss cheese
  • butter
  • poppy seeds
  • garlic

Substitutions and Variations

  • Use Hawaiian Sweet rolls
  • Use any sandwich condiment you like, or try adding some horseradish to the mayo
  • Switch up the cheese, try pepper jack, provolone, or Monterey Jack
  • Change the meat to turkey or roast beef
  • Use the topping for any slider, try Italian cold cuts with provolone etc.


Kitchen Tips and Notes

  • Make sure to cut the rolls in half horizontally without separating the rolls.  It will make assembly so much easier.
  • You will need aluminum foil to cover the sliders when baking.
  • Taking the aluminum foil off for the last 5-10 minutes will help them get brown and a little crustier on the top.
  • Make as many slider as your want to fit the situation or number of people you are serving.


HUNGRY FOR MORE? Subscribe to emails at the top of this page and follow along on Facebook,  and Pinterest for all of the latest updates.


Ham and Swiss Sliders


makes 12 sliders


1 package of 12 dinner rolls
spicy brown mustard
mayonnaise
1 pound sliced deli ham
6 slices Swiss cheese, halved
4 Tablespoons butter, melted
2 teaspoons poppy seeds
2 cloves garlic, minced

Preheat your over to 350 degrees.

Without separating rolls, cut rolls in half horizontally and then place bottom halves of rolls in a baking pan. Spread bottom rolls with spicy brown mustard, and the tops with mayo.  Layer with ham and cheese, then place on the tops.  

In a small bowl add melted butter, poppy seeds, and minced garlic.  Stir to combine.  Brush the tops of the rolls with the butter mixture making sure to get the garlic and poppy seed that tend to go to the bottom of the mixture.  Cover with aluminum foil.

Bake, covered, 20 minutes. Uncover and bake another 5 minutes.  Serve hot.


Sunday, April 30, 2023

Homemade Banana Pudding with Chessman Cookies (lighter version)

My Homemade Banana Pudding with Chessman Cookies is a Southern essential dessert made lighter and served up as parfaits.  Perfect for all your spring and summer celebrations!


Homemade Banana Pudding with Chessman Cookies 

(lighter version)


Banana pudding is such a favorite southern dessert, I don't know anyone who doesn't love it.  I've taken my mom's recipe and made a lighter version and then changed the presentation by serving it as cute little parfaits.  I've also swapped out the typical vanilla wafers for these cute shortbread Chessman cookies from Pepperidge Farms to elevate it just a little bit.

This easy to make homemade recipe is the perfect dish for upcoming celebrations like Mother's Day, Father's Day, Memorial Day, 4th of July, and all types of picnics and BBQs all summer long.  It's definitely a dessert you will be wanting more.

Enjoy!


What Ingredients do I need?

  • 2% milk
  • unsalted butter
  • sugar
  • cornstarch
  • pure vanilla extract
  • bananas - you will want ripe bananas
  • Pepperidge Farm Chessman Butter Cookies
  • (Optional) whipped cream


Substitutions and Variations

  • Use any shortbread of vanilla wafer cookie.
  • Change of the flavor of pudding, try chocolate by adding 1/4 cup of cocoa powder of for white chocolate pudding add 4oz of white chocolate.
  • This dessert can be layered in an 8x8 square pan instead of individual parfaits.


Kitchen Tips and Notes

  • Since there are so few ingredients you want to use the best quality ingredients available to end up with a quality product.
  • Pudding will last in the refrigerator up to 3 days.


HUNGRY FOR MORE? Subscribe to emails at the top of this page and follow along on Facebook,  and Pinterest for all of the latest updates.


Homemade Banana Pudding with Chessman Cookies (lighter version)


serves 4-6


2 cups 2% milk
2 tablespoons unsalted butter
5 tablespoons sugar
2 tablespoons cornstarch
2 tablespoons water
1 tablespoon pure vanilla extract
3 medium bananas
1 pkg Pepperidge Farm Chessman Butter Cookies
(Optional) whipped cream


Combine the milk and butter in a medium saucepan over medium-low heat, stirring to melt the butter.

Mix together 5 tablespoons of sugar and the cornstarch in a small bowl.   Add 2 tablespoons water and mix to create a paste.   Whisk into the milk mixture.   Turn the heat up to medium and cook until thick and bubbly, about 6 to 10 minutes.   Remove from the heat and stir in the vanilla extract.

Transfer to a bowl, cover with plastic wrap (make sure the plastic is touching the pudding to prevent a skin from forming) and refrigerate for at least 4 hours.

To make parfaits:  Place 1 cookie on the bottom of each parfait glass.  Then add a layer of bananas and a layer of pudding. Repeat to make a second layer. Top with whipped cream if using and place a cookie standing up on the side of the glass in the pudding.  Serve.


LinkWithin

Related Posts Plugin for WordPress, Blogger...