Showing posts with label pie. Show all posts

Friday, August 28, 2026

Fresh Peach Galette – A Last Taste of Summer


This Fresh Peach Galette with Vanilla & Almond lets ripe summer peaches shine with simple flavors and a golden, flaky crust. No cinnamon, brown sugar, or butter needed.


Fresh Peach Galette – A Last Taste of Summer


There are some summer desserts that just don't need much help.

When peaches are ripe, juicy, and perfectly sweet, I don't want to bury them under brown sugar, cinnamon, or a heavy layer of spices. I want the peaches to taste like peaches.

That's exactly what inspired this Fresh Peach Galette - A Last Taste of Summer.

This is a simple dessert built around ripe summer fruit. The peaches are lightly sweetened and flavored with vanilla, a tiny splash of almond extract, and fresh lemon juice—just enough to enhance their natural flavor without taking over.

And here's another thing I love about this recipe: there's no peeling required. The peach skins stay right on, adding beautiful color and a little texture while saving you from one of the more tedious parts of baking with fresh peaches. Because honestly, peeling peaches can feel like a job all by itself.

There's no brown sugar, no cinnamon, and no butter in the filling. Instead, the fruit stays front and center, tucked into a golden, flaky crust with those beautiful peach juices bubbling around the edges.

And because we're using a ready-made pie crust, this is the kind of summer dessert that feels special without requiring you to spend an afternoon in the kitchen.

Serve it slightly warm on its own, or add a scoop of vanilla ice cream and let the peaches do what they do best.

Enjoy!


-- Ingredients

This galette is intentionally simple. Each ingredient helps highlight the flavor of the fresh peaches without competing with them.

  • Fresh Peaches - The star of the recipe. Use ripe peaches that are fragrant and juicy but still firm enough to slice. There's no need to peel them—the skins add beautiful color and a little texture.
  • Granulated Sugar - A light amount of sugar enhances the peaches without making the filling overly sweet. If your peaches are especially sweet, you may not need the additional sugar.
  • Cornstarch - Helps thicken the peach juices as the galette bakes so the filling isn't overly runny.
  • Fresh Lemon Juice - Adds just enough brightness to balance the natural sweetness of the peaches.
  • Vanilla Extract - Adds a soft, familiar sweetness that complements the fresh fruit.
  • Almond Extract - Just a small amount adds depth and pairs beautifully with peaches. You shouldn't immediately think, "This tastes like almond." It simply gives the filling a little something extra.
  • Salt - A tiny pinch helps bring all of the flavors together.
  • Refrigerated Pie Crust - The shortcut that makes this an easy summer dessert. No homemade pastry required.
  • Egg - Brushed around the crust to give it that beautiful golden finish.
  • Coarse Sugar - Optional, but lovely sprinkled around the crust for a little sparkle and crunch.


-- Equipment

You only need a few basics to make this galette:

  • Baking sheet
  • Parchment paper
  • Mixing bowl
  • Sharp knife
  • Pastry brush
  • Cooling rack

My Go-To's

  • Parchment paper - this promotes even baking and creates a non-stick surface
  • Pastry brush - the easiest way to brush on the egg wash
  • Baking sheet - a good sturdy baking sheet will last for years and promote even baking.  No warping here!


-- Let's Make It Together

Slice the peaches and gently toss them with the sugar, cornstarch, lemon juice, vanilla, almond extract, and salt.

Unroll the pie crust directly onto a parchment-lined baking sheet and sprinkle a little sugar in the center. Arrange the peaches in a shallow layer, leaving a border around the edge.

Fold the dough over the peaches in loose pleats, brush the crust with egg wash, and sprinkle with coarse sugar if you'd like.

Bake until the crust is deeply golden and the peach juices are bubbling. Then give the galette at least 30 minutes to cool so those juices can thicken before slicing.


-- Perfecting the Baking Process

  • Use Ripe but Firm Peaches - You want peaches that taste sweet and juicy but aren't so soft that they turn to mush when sliced. Slightly firm peaches will hold their shape better as the galette bakes.
  • Keep the Filling Shallow - Arrange the peaches in a relatively shallow layer rather than piling them high. I shingled them in concentric circles starting 2 inches from the outside edge of the crust and working in toward the middle.  This helps the fruit cook evenly and allows the juices to bubble and thicken.
  • Don't Skip the Sugar Under the Peaches - Sprinkling a little granulated sugar over the center of the dough creates a subtle layer between the crust and fruit. It's a small step that adds a little sweetness where the peaches meet the pastry.
  • Watch the Crust - Start checking the galette around 30 minutes. If the crust is becoming too dark before the filling is finished, loosely cover the edges with foil.
  • Let It Cool Before Slicing - This is important. The peach juices will continue thickening as the galette cools. Give it at least 30 minutes before slicing for a cleaner slice.


-- Add Your Touch

This recipe is intentionally simple, but there are a few ways you can change it up:

  • Add a little more almond extract for a stronger almond flavor.
  • Sprinkle sliced almonds over the peaches before baking.
  • Add a handful of fresh raspberries or blueberries.
  • Serve with vanilla ice cream.
  • Add a dollop of lightly sweetened whipped cream.
  • If you prefer a sweeter dessert, add the extra teaspoon of sugar to the peaches.

I'd avoid adding cinnamon or warm spices here—they would completely change the personality of this particular galette.


Set the Mood

Meals taste even better when the table feels inviting. Here are a few simple ways to set the mood for this recipe.


A Last Taste of Summer

There is something about late-summer peaches that makes me want to keep the recipe simple.

No cinnamon. No brown sugar. No heavy filling. Just ripe peaches with a little vanilla, a hint of almond, and a golden, flaky crust.

This Fresh Peach Galette – A Last Taste of Summer is exactly the kind of dessert I want to make while beautiful summer peaches are still around. It celebrates the fruit for what it is—and lets you enjoy one more sweet bite of summer before the season changes.

More Peach Recipes to Try

If you're as reluctant as I am to say goodbye to peach season, you might also enjoy:

🍑 Fresh Peach Almond Muffins — Tender, lightly sweetened muffins filled with juicy peaches and finished with crunchy almonds.

🍑 Peach Cucumber Salad with Citrus & Sumac A vibrant salad with citrus, sumac, and herbs—refreshing, simple, and perfect for the summer-to-fall transition.

🍑 Sweet Peach Dutch Baby with Honey Laced Ricotta  A light and fluffy Dutch Baby pancake filled with juicy ripe peaches.

🍑 Sue's Deep Dish Georgia Peach Cobbler  A light and fluffy Dutch Baby pancake filled with juicy ripe peaches.


Before You Start


Do I need to peel the peaches?
No! That's one of the things I love about this recipe. The skins can stay right on, saving you the extra work of peeling them. They also add beautiful color and a little texture to the finished galette.

What kind of peaches work best?
Use ripe, fragrant peaches that are still firm enough to slice. Very soft or overly ripe peaches can release a lot of juice and become mushy during baking.

Can I use frozen peaches?
Fresh peaches are best for this recipe because they're really the star. Frozen peaches release more moisture and can make the filling wetter.

Why is there sugar under the peaches?
The light layer of sugar adds sweetness to the pastry and creates a little separation between the fruit and crust.

Can I make this with homemade pie dough?
Absolutely. A homemade pie crust would work beautifully if you prefer making your own pastry. The refrigerated crust simply keeps this recipe quick and easy.

How do I know when the galette is done?
The crust should be deeply golden and the peach juices should be visibly bubbling around the fruit.

Why should I let the galette cool before slicing?
The filling needs time to set. As the galette cools, the peach juices thicken, making it easier to slice and serve.


Friday, June 12, 2026

Mixed Berry Galette with Lemon & Vanilla


Mixed Berry Galette with Lemon & Vanilla is an easy rustic summer dessert made with fresh berries, flaky pie crust, and bright lemon flavor. Perfect for holiday gatherings, backyard cookouts, farmers market weekends, and simple summer entertaining.


Mixed Berry Galette with Lemon & Vanilla


There’s something about summer berries that makes even the simplest desserts feel special.

Growing up, my mom was known for her homemade pies. She had a way of turning an ordinary afternoon into something memorable simply by pulling a fresh pie from the oven. My dad especially loved fruit pies, and they were always the desserts he requested most often. This Mixed Berry Galette with Lemon & Vanilla is my little tribute to him—a simpler, rustic version of the berry-filled desserts that made so many family meals feel special.

Every year, I find myself bringing home more berries than I planned to buy—containers of blueberries, strawberries, blackberries, and raspberries that looked too beautiful to leave behind at the farmers market. While some inevitably disappear as snacks throughout the week, the rest often find their way into easy desserts like this galette.

Galette's have got to be the easiest pies I've ever made! One of the things I love most about a galette is that it feels impressive without requiring much effort. There’s no pie plate to fuss with, no perfectly crimped edges to worry about, and no pressure to make it look flawless. The rustic folds are part of the charm.

As the berries bake, they become jammy and concentrated while the lemon and vanilla brighten every bite. The crust turns golden and crisp around the edges, creating the perfect contrast to the juicy fruit filling.

Whether you're planning a Fourth of July gathering, a summer cookout, or simply looking for a dessert to enjoy on the patio with a scoop of vanilla ice cream, this galette is one you'll return to all season long.

Enjoy!


-- Ingredients

For the Filling

  • Mixed berries (blueberries, raspberries, blackberries, strawberries)
  • Granulated sugar
  • Cornstarch - Helps thicken the berry juices as they bake.
  • Lemon zest - Adds bright citrus flavor that enhances the berries.
  • Lemon juice - Balances the sweetness and keeps the filling tasting fresh.
  • Vanilla extract

For the Crust

  • Store-bought pie dough, chilled or homemade if preferred
  • Egg
  • Coarse sugar (optional)


-- Equipment

  • Large mixing bowl
  • Measuring cups and spoons
  • Citrus zester
  • Baking sheet
  • Parchment paper
  • Pastry brush
  • Cooling rack

My Go-To's

Half Sheet Pan - A sturdy sheet pan helps the galette bake evenly while giving the crust plenty of room to brown beautifully.

Parchment Paper - Makes transferring and serving the galette easy while preventing sticking.

Microplane Zester - Perfect for capturing the bright lemon zest that makes the berry filling pop.


-- Let's Make It Together

Preheat the oven and line a baking sheet with parchment paper.

In a bowl, combine the berries, sugar, cornstarch, lemon zest, lemon juice, and vanilla until everything is evenly coated.

Place the pie dough on the prepared baking sheet and gently roll it into a roughly 12-inch circle if needed.

Spoon the berry mixture into the center, leaving a border around the edges. Fold the dough over the filling, pleating as you work your way around.

Brush the crust with egg wash and sprinkle with sugar. Bake until the crust is golden and the berries are bubbling.

Allow the galette to cool for a few minutes before slicing and serving.


-- Perfecting the Cooking Process

The biggest key to a successful galette is keeping the filling centered and leaving enough border to create sturdy folds. If your berries seem especially juicy, don't skip the cornstarch—it helps create a thick, jammy filling instead of one that runs across the baking sheet.


-- Add Your Touch

One of the best things about a galette is how easy it is to customize based on what's in season or what you happen to have on hand.

  • Add sliced peaches to the berry mixture
  • Stir in a pinch of cinnamon
  • Use all blueberries or all strawberries
  • Sprinkle sliced almonds over the filling before baking
  • Finish with a dusting of powdered sugar before serving 


-- Set the Mood 

Food is about more than just the recipe—it’s about the moment around the table. Here are a few simple ideas to set the mood when you serve this dish.


This Mixed Berry Galette with Lemon & Vanilla is one of my favorite ways to celebrate berry season. It's simple enough for a casual weeknight dessert but beautiful enough to serve at holiday gatherings, summer cookouts, and backyard dinners with friends.

If you're looking for more seasonal recipes, be sure to check out my Strawberry Blueberry Muffins with Lemon & Oat Crumb Topping, Roasted Tomato Bruschetta with Whipped Goat & Ricotta, and Mediterranean Quinoa Salad. Each recipe celebrates the fresh flavors of the season while keeping things approachable and easy to make.

However you serve it, I hope this galette finds its way to your table at least once before berry season slips away.


Before You Start

Can I use frozen berries?
Yes. Use them directly from frozen and expect the baking time to increase by a few minutes.

Do I need to thaw frozen berries first?
No. Thawing can create excess liquid and make the filling watery.

Can I make this ahead of time?
Yes. The galette can be baked several hours in advance and served at room temperature.

What berries work best?
Any combination of strawberries, blueberries, raspberries, and blackberries works beautifully.

How should leftovers be stored?
Store covered in the refrigerator for up to 3 days.

Can I use homemade pie dough?
Absolutely. Homemade dough works wonderfully if you have a favorite recipe.


Monday, January 30, 2017

Easy Chocolate Coconut Tart


This five ingredient Chocolate Coconut Tart couldn’t be easier or more seductive! A chocolate cookie crust contains a chocolate coconut ganache that’s sprinkled with coconut and chocolate curls.


Can you believe it's only about 2 weeks until Valentine's Day?  Didn't we just celebrate New Years?  I can't believe how time flies.  Valentine's Day is a good reason to make a decadent dessert.  Can anyone say chocolate?  There nothing better than a dark chocolate sauce.  Add in some coconut and you have the dessert of your dreams in the form of a tart that reminds you of an Almond Joy bar!

CHOCOLATE COCONUT TART


This decadent dessert only needs five ingredients.  How easy is that?  A chocolate cookie crust holds a pool of chocolate coconut ganache that’s then sprinkled with chocolate curls and shredded coconut.  HEAVEN!


The chocolate coconut ganache flavor is definitely the star of this tart and is easy to make!  Heavy cream, dark chocolate chips and Smucker's Simple Delight Chocolate Coconut Flavored Topping are whisked together to make this decadent sauce.  The crust is a simple chocolate wafer cookie crushed and combined with some melted butter.  Couldn't be easier, really.


I hope you make this seductive tart for your Valentine this year, it totally sets the mood!

Enjoy!


Easy Chocolate Coconut Tart


serves 8-10

32 chocolate wafer cookies (I used
Nabisco Famous Wafers)
6 Tbls butter, melted
1 1/4 cups heavy cream
1 cup dark chocolate chips
1 cup
Smucker's Simple Delight Chocolate Coconut Flavored Topping
Garnish:  chocolate bar curls and shredded coconut

Preheat oven to 350 degrees.

In a food processor, add cookies and pulse until you have fine crumbs.  Add the melted butter and pulse until just combined.  

To a tart pan add cookie crumbs and press along the bottom and up the sides.  I use the bottom of a measuring cup to even it out and compact it down.  Place on a baking sheet and place in the preheated oven.  Bake 20 minutes or until set in the middle.  Remove and place on a wire rack.  Cool completely. 

Meanwhile, in a microwave safe bowl, add heavy cream, chocolate chips and chocolate coconut sauce. Microwave on high 1 minute and stir together until melted.  Pour the sauce into the cooled tart shell.  Refrigerate about 1-2 hours until set.  Garnish with chocolate curls and shredded coconut and serve.


Thursday, December 22, 2016

Using Leftovers: Pumpkin Pie Milkshakes


Yum

I usually don't ever have leftover pumpkin pie that I don't know what to do with!

We usually just eat it all...

However, there have been times when we had multiple desserts and just too much pumpkin pie to finish before it gets old.  So I have a delicious and easy way to use that leftover pumpkin pie!


PUMPKIN PIE MILKSHAKES

This shake is the real deal....it's made with actual pie!

You are going to love this Pumpkin Pie Milkshakes.  And the kids?...forget about it!  This drink is really off the hook.  By putting a slice of pie, crust in all into the shake you get a chunky texture that tastes like mix-ins at your favorite ice cream parlor. 


So if you are planning on having pumpkin pie for Christmas make sure to save a couple of slices and make these Pumpkin Pie Milkshakes.  They are soooo good!

Enjoy!


Pumpkin Pie Milkshakes

serves 1-2

1 slice of pumpkin pie (crust and all!)
1 -2 scoops of vanilla ice cream
1/3 - 1/2 c milk
Garnish:  whipped cream, sprinkles

Place all ingredients in a blender.  Turn on blender and blend until all ingredients are combined, leaving a little texture from the crust.

Pour in tall glasses and serve.


Wednesday, December 14, 2016

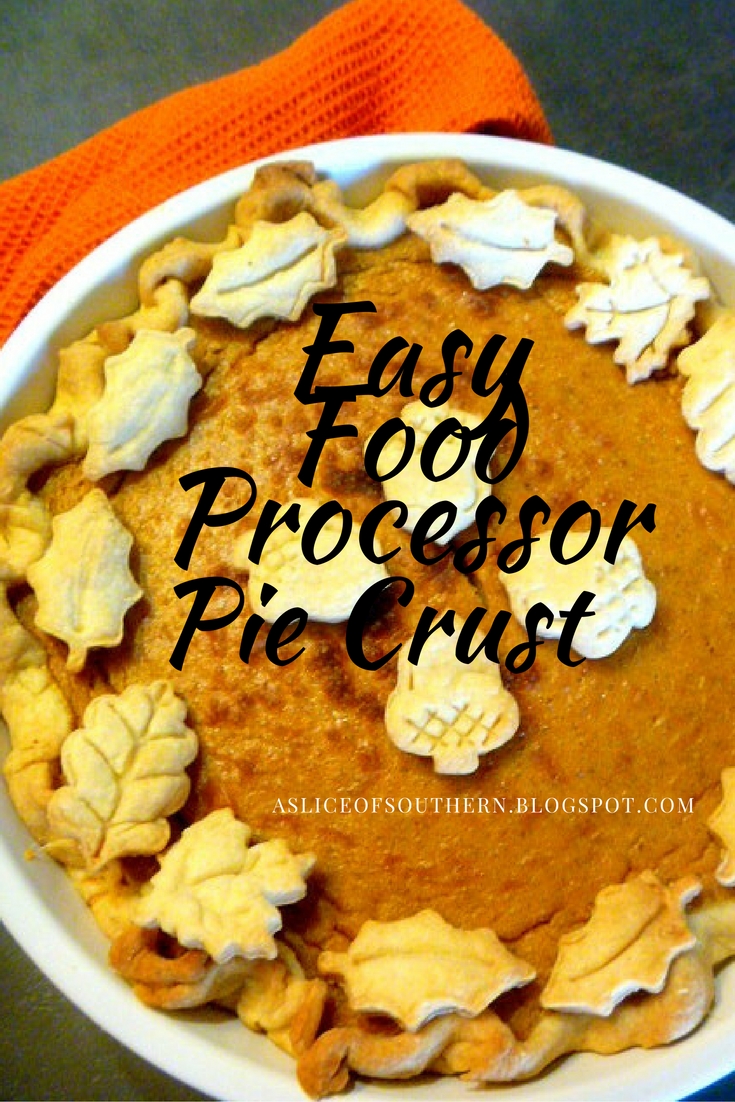
Easy Food Processor Pie Crust


Yum

My mom has been making pies all her life.  Every kind of cream pie you can imagine along with some excellent fruit pies thrown in the mix!

She's old school though.  She learned from her mom and went by feel when making the pie dough using a base recipe passed down from my Grandma.


Fast forward many years as an adult and I'm making the pies, and my mom is teaching me how to make the dough from scratch.  I know a lot of you are mystified by making homemade pie crust but trust me when I say, it is REALLY EASY.

Now I usually use my Grandma's recipe but this year I switched it up a bit.  I wanted something that had both butter (for flavor) and shortening (for flakiness) and is made using a food processor.  Off I go searching through my multitude of cookbooks where I found the perfect recipe that met all my wishes.  The King Arthur 200th Anniversary Cookbook is full of wonderful recipes.  I recommend you picking up a copy.  This cookbook is so fabulous and it has so many recipes in it that will fulfill ALL your baking needs.  They had a multitude of recipes for pie crust including the one I am showing you today. 


So I got out my handy dandy food processor (I use this one) and the ingredients, and made this in about 5 minutes.  No kidding.  It's so EASY in a food processor.  Dump and pulse, pulse, pulse.  Then in the frig goes the dough for 45 min to an hour and then you are ready to make pie!


Go for it!  Make your pie crust from scratch, and try this recipe.  The dough was so easy to work with, it rolled out like a dream, and held together really well when forming the edges.  The taste?  Heavenly!  The butter flavor stood out and the crust was flaky to boot!  You are sure to love this crust.


The pie you see here is my favorite Pumpkin Pie with Orange Marmalade.  I've been making this for years and the light citrusy flavor brings an extra special something to your dessert! 

Enjoy!


Easy Food Processor Pie Crust

source:  The King Arthur 200th Anniversary Cookbook

1 3/4 c All Purpose Flour
1/2 tsp salt
1 T sugar (optional)
1/2 c (1 stick) unsalted butter, cold or frozen, cut into 4 pieces
2 T solid shortening
about 6 Tablespoons ice water

Using the steel blade of the food processor, quickly blend flour, salt, sugar, butter and shortening.

Slowly pour in the ice water through the feed tube while pulsing the machine.  Process only until a mass of dough has formed on the side of the bowl.  Don't overdo it.  Wrap the dough in plastic and chill for at least an hour. (You can also freeze the dough at this point.)

Roll out and place inside pie dish.  Makes enough pastry for a 8 inch, double-crust pie or a single crust for a 9 - 11 inch pie.  This crust can be filled and baked at this point, or baked blind.


Tuesday, November 15, 2016

6 Irresistible Pumpkin Recipes


Yum

We're celebrating the wonderful pumpkin today! 

I love pumpkins and can hardly wait for October to roll around each year so I can bake (and cook) with pumpkin. 

If you love pumpkin too then this post is for you!  I'm sharing with you 6 of my favorite pumpkin dishes today.  These are the ones I gravitate to each year.  I hope you enjoy them and find one that becomes a favorite of yours as well.

Enjoy your pumpkins!


Pumpkin Citrus Crescent Rolls


Pumpkin Cobbler


Pumpkin Pie with Orange Marmalade


Layered Pumpkin Bread


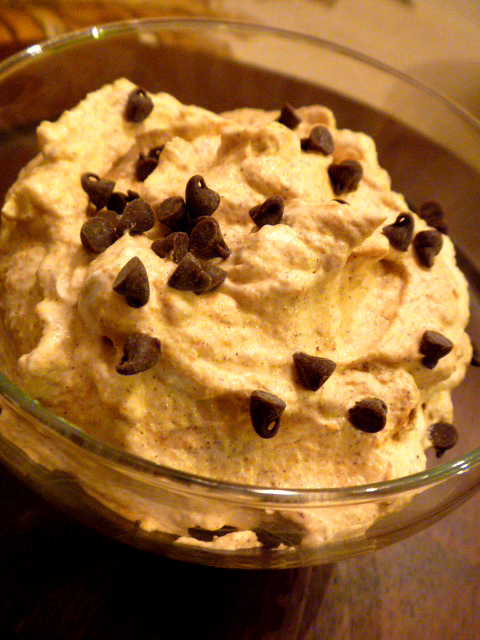
Spicy Pumpkin Fool


Low Carb Pumpkin Pancakes


LinkWithin

Related Posts Plugin for WordPress, Blogger...