Showing posts with label Ice Cream. Show all posts

Thursday, September 11, 2025

Lemon Cream Gelato in Minutes – Williams-Sonoma Starter Taste Test


Craving gelato without the fuss? I put the Williams-Sonoma Lemon Cream Gelato Starter to the test—see how it tastes, how easy it is to make, and if it’s worth the splurge.


Lemon Cream Gelato in Minutes – Williams-Sonoma Starter Taste Test


Earlier this summer, I attended a cooking class at Williams Sonoma where they were showcasing some of their seasonal products. The store was full of bright, summery flavors and inspiration, but one item in particular caught my eye—the Lemon Cream Gelato Starter. I’ve made my fair share of custard-style ice creams and classic American churns, but gelato has always felt like a bit of a mystery to me. When I spotted this shortcut, I thought, why not give it a try?

This post isn’t so much a step-by-step recipe as it is a review of the product itself, though I’ll share the simple instructions for using the starter below. Think of it as my honest take on whether this jar of mix  really results in a creamy, citrusy gelato experience.  If you’ve ever been tempted by the idea of homemade gelato but hesitant to tackle it from scratch, this just might be the product for you! 

Enjoy!


The Difference Between Gelato and Other Ice Creams

What is gelato anyway? I’ll admit, I’m pretty new to the world of gelato, having mostly stuck to custard-style ice creams and classic American churns. At first, it all felt a little mysterious—but here’s the gist: gelato is creamier, denser, and often a little more flavorful than regular ice cream.

The main differences are pretty simple. Gelato usually has less fat because it’s made with more milk and less cream, and it’s churned more slowly, which keeps it dense and silky. Traditional gelato makers are designed to do this slow churning, but you don’t need a fancy machine at home. A standard ice cream maker will still give you a smooth, creamy result, especially when using a ready-made starter like this one.


Gelato vs. Ice Cream: What You Need to Know

  • Fat & Texture: Gelato uses more milk and less cream → lighter but still creamy.
  • Churning: Gelato is churned slowly → dense, silky, and smooth.
  • Serving Temp & Flavor: Served at a slightly warmer temperature → melts in your mouth and packs flavor. Less air and fat means the taste really comes through.
  • Machine Tip: Traditional gelato makers are designed for slow churning, but don’t worry—you don’t need one. A regular ice cream maker works just fine, especially if you’re using a starter like this one.


Williams-Sonoma Gelato Starter (Lemon Cream) Review

Product overview

When I spotted Williams-Sonoma’s Gelato Starter in the Lemon Cream flavor, I was curious to see how easy it could make homemade gelato. You'll receive two individual packets in the container which allows you to make two separate 1 quart batches.  The starter is premixed, but you’ll still need to add heavy cream and half-and-half to complete the base. The flavor profile promises a bright, citrusy lemon balanced with creamy vanilla—perfect for a refreshing summer dessert that still feels indulgent.

I’ll admit, I’m not a gelato expert, but I do love a creamy, smooth scoop. What I immediately appreciated about this starter was the convenience: it takes the guesswork so you can focus on the fun part—churning and tasting. For anyone who wants to enjoy homemade gelato without spending hours in the kitchen, this Lemon Cream starter feels like a shortcut that doesn’t compromise on flavor or texture.


What I Liked

  1. Ease of Use
    The starter is wonderfully straightforward—I hand whisked heavy cream, half-and-half, and the mix, and then put the bowl in the refrigerator to chill for for 4 hours.  Then it was ready for churning. Perfect for anyone who wants to enjoy homemade gelato without a lot of prep or guesswork.

  2. Creamy Texture
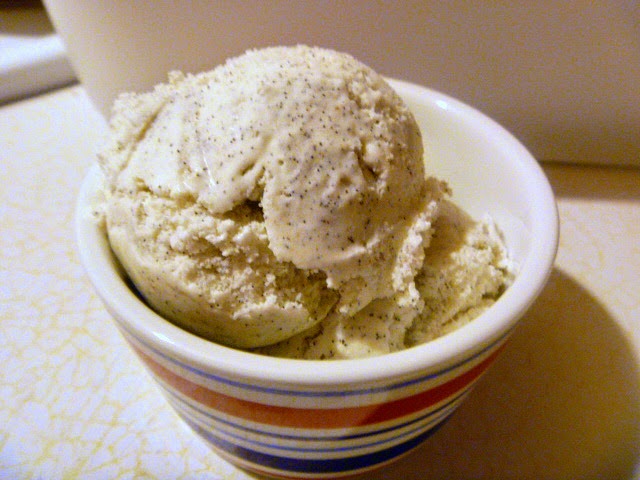
    The texture was incredibly smooth and creamy, unlike a lot of homemade ice creams. I was honestly astonished at how silky it was, even after freezing. Every spoonful felt indulgent without being heavy.

  3. Balanced Flavor
    The lemon flavor is very prominent, but blending it with the milk and cream softens it into a more mellow, rounded taste. It’s bright and refreshing without being sharp or overpowering—just the right balance for a summer treat.


What Could Be Better

Honestly, there’s very little I would change about this gelato starter—I absolutely loved the final result. It’s convenient, easy to use, and produces a creamy, flavorful gelato that tastes like something you’d find in a gelateria. The only thing to note is that it’s a bit of a splurge compared to making gelato from scratch, but if you value convenience and a high-quality, homemade-style gelato experience, it’s worth every penny.


Tips for Getting the Best Result

  • Boost the Lemon: If you like a little extra zing, adding a touch of fresh zest can brighten things up beautifully.

  • Chill Before Churning: Letting the base rest in the fridge for a few hours—or even overnight—helps the gelato achieve that perfectly smooth texture.

  • Don’t Overthink the Machine: I only have a regular ice cream maker without a gelato setting, and it worked perfectly. Whether you have a dedicated gelato machine or a standard one, you’ll still get wonderfully smooth, creamy results—just follow the starter instructions and enjoy the process.

  • Add a Fun Twist: This Lemon Cream base is a perfect canvas for mix-ins—fresh berries, chopped pistachios, or a crumble of shortbread cookies take it to the next level without extra fuss.  I'm definitely going to try the shortbread cookie crumbles in my next batch!


Final Thoughts

Is it worth the buy? Yes!

I really enjoyed making gelato with the Lemon Cream starter—it was creamy, flavorful, and incredibly satisfying without requiring hours in the kitchen. I love how convenient it is while still producing a high-quality, homemade-style gelato. I would definitely buy this again to try some of the other flavors Williams-Sonoma offers, like Pistachio, Stracciatella, Mixed Berry, Chocolate Hazelnut, and Cappuccino. If you’re a gelato lover—or just curious to try making it at home—this starter makes it easy, fun, and delicious.


HUNGRY FOR MORE? Subscribe to emails at the top of this page and follow along on Facebook,  and Pinterest for all of the latest updates.


    RECIPE IS DOWN BELOW👇     


Thursday, August 30, 2018

It's Time for Labor Day: Vanilla No Churn Ice Cream


This Vanilla No Churn Ice Cream is the perfect, quick, dessert to whip up anytime!  Slice of Southern


Yum

Summer lasts well in to October in Southern California.  But I do have to say that there has been a slight change in the weather lately that hints that fall is coming.  The evenings are getting shorter and are definitely a lot cooler than usual.

So we are celebrate the last few precious evenings of summer and are planning our Labor Day weekend with the theme "The Bounty of Summer"!.  This will include a backyard BBQ, some spectacular pasta salads, easy in-season vegetable side dishes and for dessert a no churn ice cream.


This Vanilla No Churn Ice Cream is the perfect, quick, dessert to whip up anytime!  Slice of Southern

This is the first time I've ventured into the "no churn" ice cream realm.  Being a lover of old fashioned goodness I was hesitant to try this.  Boy was I pleasantly surprised and wish I had joined the fun ages ago!  I decided to go with a basic vanilla recipe that could be used for a base in an ice cream bar that I'll be setting up.  We'll have a variety of different fruits, chocolate, nuts, and candy to top your sundae to your hearts desire.

Is it really no churn?  Yes, you actually can make ice cream without churning it!  As amazing as it sounds it's true, and it tastes just as amazing!  It only takes 3 ingredients to make this wonderful ice cream:  whipping cream, sweetened condensed milk, and vanilla.  I actually used a vanilla bean pastes which infused the ice cream with flavorful flecks of vanilla bean seeds.  I just love the looks of vanilla flecks running through my ice cream!  You can purchase this here.  Of course, you can always use pure vanilla extract.  Since you are only using 3 ingredients make sure to use ones that are top quality so your ice cream comes out top notch!


This Vanilla No Churn Ice Cream is the perfect, quick, dessert to whip up anytime!  Slice of Southern

Does it taste like ice cream?  It actually does!  I was skeptical since I've made homemade churned iced cream all my life and I'm partial to it.  But after trying this I found that this is a great quick and easy substitute.  Lots of ice cream uses eggs that you cook into a custard base, but there are those that are just cream, half and half, and sugar.  The ingredients are similar in the no churn version and the fact that you whip the cream you are creating that air infused base which simulates churned ice cream.

What tools do I need? To make this ice cream you will need a stand or hand mixer such as this one, or this one.  You will need a rubber spatula such as this one.  Good vanilla bean paste.  Plus a freezer safe container to hold your ice cream.  I'm partial to this one because it's easy to scoop from!


This Vanilla No Churn Ice Cream is the perfect, quick, dessert to whip up anytime!  Slice of Southern

This Vanilla No Churn Ice Cream is the perfect, quick, dessert to whip up for your Labor Day festivities.  As it takes time to set up in the freezer it's perfect for making the day before.  Dress it up or keep it simple, any way you top it you're gonna love this ice cream!

Enjoy!


More Labor Day recipes:
Butter Burgers
Quick and Easy Strawberry Lemonade
The BEST Broccoli Pasta Salad
Indian Summer Fresh Corn Salad
Cast Iron Summer Berry Cobbler


Vanilla No Churn Ice Cream

Yield: 1 1/2 pints

2 cups heavy whipping cream
1 14 oz can sweetened condensed milk
2 teaspoons vanilla bean paste

Using a stand or hand mixer, whip whipping cream until stiff peaks form, about 3 minutes.  Pour in condensed milk and vanilla bean paste and gently fold into the whipped cream until combined.  Pour into a freezer safe container and place in the freezer to set 3-4 hours or overnight.


This Vanilla No Churn Ice Cream is the perfect, quick, dessert to whip up anytime!  Slice of Southern

This Vanilla No Churn Ice Cream is the perfect, quick, dessert to whip up anytime!  Slice of Southern


This post contains affiliate links for items you may purchase and I am paid a small compensation fee at no cost to you.


Monday, July 11, 2016

Summer Dessert Heaven: Grilled Lemon Pound Cake with Strawberries and Vanilla Ice Cream


Yum

Yay for summertime!

I love summer.  Eating alfresco, cooking on the grill, and hanging by the pool.

We had a nice bash over the weekend with some friends we hadn't seen in forever...and we took that time to fire up the grill for some fresh food.  Even dessert was finished up using the grill!


So let's talk about this dessert.  Do you like lemon?  MGG loves it, it was my mom's favorite as well, and I like it mainly in baked goods such as muffins and cakes.  Pies? not so much.  In planning my menu I was sifting through an old Cook's Country magazine and had dog-eared a recipe for Meyer Lemon Pound Cake.  Say what? Lemon pound cake...ummm yes please!

Now, I know it's summer, and it's taboo to turn on the oven  but this was a serious situation here.  I had to have this pound cake.  So I got up really early and used the oven before the day got hot.  Success!!!  This cake was so easy to make. I even snuck some of the batter, so I knew it would taste outrageous.  And it did!  Everyone said so....haha!


Typically during the summer, our desserts run toward angel food cakes, trifles, pudding of some sort etc.  You know, throw it together quick and easy stuff.  So the pound cake did require more time than we usually put into our desserts but it was well worth it.  You could just as easily buy a ready made pound cake (it may not be lemon) and it would work just as well, but you really should try this lemony one.  The flavors of lemon and strawberry together are heaven.  So worth the effort.


Once the cake is made the rest is easy.  After the dinner grilling was done I grilled slices of this luscious lemon pound cake and plated them with macerated strawberries and a big ole scoop of vanilla ice cream.  Oh man, was this gobbled down by everyone.  Our long lost friends may not be so lost after eating this.  I'll bet we see them often this summer just to get more of this Grilled Lemon Pound Cake with Strawberries and Vanilla Ice Cream!

Enjoy!


Grilled Lemon Pound Cake with Slice Strawberries and Vanilla Ice Cream


Pound Cake
1 3/4 cups all-purpose flour
1/2 teaspoon baking powder
1/2 teaspoon salt
1/4 cup sour cream
1 1/2 tablespoons Meyer lemon juice
1 1/2 tablespoons Meyer lemon zest
1 cup granulated sugar plus 2 additional tablespoons
1 cup (2 sticks) unsalted butter, at room temperature
5 large eggs, at room temperature, beaten

Toppings: 
Macerated sliced strawberries
Vanilla Ice Cream


To make the cake: Preheat oven to 325 F. Spray a 9×5-inch loaf pan with nonstick cooking spray.

In a medium bowl, sift together the flour, baking powder, and salt. Whisk the sour cream and lemon juice together in a small measuring cup.

In the bowl of a stand mixer, combine the lemon zest and sugar. Rub together with your fingertips until the sugar is moist and fragrant. Add the butter to the bowl and beat the butter/sugar mixture on medium speed until very pale and fluffy, about 3-4 minutes. Scrape down the sides of the bowl. Mix in the eggs in 3 additions, beating well after each addition until the mixture is smooth (stop to scrape down the sides of the bowl as necessary). With the mixer on low, alternately add the dry ingredients in 3 additions and the sour cream mixture in 2 additions, starting and ending with the dry ingredients. Once all the ingredients have been added, scrape down the bowl then beat on low for another 30 seconds to fully combine.

Transfer the batter to the prepared pan. Smooth the top then tap the pan on your work surface to release air bubbles. Bake the cake for 55-65 minutes, or until a thin knife inserted near the center comes out with just a few moist crumbs. Transfer the pan to a wire rack and let the cake cool for 10 minutes, then turn it out.

Once the pound cake has completely cooled, (about 2 hours) slice it into 1 inch thick slices.  Add slices to an outdoor grill, or indoor grill pan and all to toast several minutes on each side until grill marks appear.  Top with strawberries that have macerated in sugar for about 15 minutes.  Add a scoop of vanilla ice cream and serve immediately.


Pound cake was adapted from Cook’s Country, April/May 2006

Sunday, May 8, 2016

Fresh Strawberry Milkshake


Ice cream is a weakness of ours.

We just love the creamy goodness but sometimes we like to shake it up a bit from our usual scoop of ice cream.

This time we turned our favorite dessert into a creamy, dreamy, Fresh Strawberry Milkshake!  Oh man was it good! We had just come from the farmers market and had bought extra strawberries to make a shortcake with but I couldn't help myself, and decided to put them in a milkshake.


Now I typically gravitate toward a chocolate milkshake, but something about these strawberries were calling me.  Might have been the nice spring weather, or the bright red colors. Whatever it was I was disappointed because these berries were just delicious!

A milkshake is easy to make, you just through everything in the blender and turn it on.  Voila, a perfect milkshake is born.


So now we are sitting on our patio enjoying the beautiful cool weather and a delicious Fresh Strawberry Milkshake.  Life is good!

Enjoy!


Fresh Strawberry Milkshake

serves 4

8 ounces strawberries, cored and sliced
1/2 teaspoon pure vanilla extract
1 pint low-fat vanilla ice cream
1/4 cup 2% milk


Pour all ingredients into a blender and blend until smooth. Pour into glasses and serve immediately.


Wednesday, July 30, 2014

Old Fashioned Vanilla Bean Ice Cream - Lightened Version


In honor of National Ice Cream Month I've made two different homemade ice creams!

Two basic flavors that can't be beat...vanilla and chocolate.

Today I'm sharing with you the vanilla recipe.  This is an old, old recipe that I got from my mom.  It originally came from her cousin Maxine.  The note on the index card said, "One of the best vanilla ice creams" so I had to try this out.  

This ice cream is Philadelphia Style ice cream, which contains no eggs, and doesn't involve cooking the mixture. This style is quick and easy to make.  You'll have the mixture made in no time which means....ice cream that much faster! Don't you love that?

I decided to lighten this recipe up a little bit by using fat free half and half and using a sugar substitute blend. To give it more pizzazz I used ground Tahitian vanilla bean which imparted flecks of vanilla throughout the ice cream.  It turned out so pretty! 


The overall results were that this ice cream is a winner! Creamy and smooth, both MGG and I love it.  I could hardly wait for it to set up in the freezer.  I really wanted to just dip my face in the bowl and eat it but I refrained myself.  It really is that good.

So try this version and let me know what you think.  You can always substitute full fat half and half and all sugar in equivalent amounts to obtain luscious results.

Enjoy!


Old Fashioned Vanilla Bean Ice Cream - Lightened Version

2 cups whole milk
2 cups fat-free half and half
3/4 cup sugar (I used 1/4 cup + 2 Tablespoons Splenda Blend)
2 teaspoons vanilla, vanilla paste, or ground vanilla bean

In a medium bowl whisk all ingredients together until sugar dissolves.  Pour into a bowl of an ice cream freezer.  Freeze according to manufacturer's instructions.  Trans
fer to an airtight container.  Cover tightly and freeze several hours until set.  


Thursday, November 7, 2013

Bananas Foster Sundae


It's time for a little decadence...


I'll let you in on a little secret.  MGG has to weaknesses and I know what they are...

Snacks and Ice Cream.  Yes, that's right.  Ice Cream.

He loves to have a bite of ice cream for dessert. 

Daily.

It's his guilty pleasure...

I'm sure we all know about those don't we?  So as usual the other night after dinner he's wanting a scoop of ice cream.  I decided to make him a special treat by creating a Bananas Foster Sundae for him instead of his usual cone.

I grab some ripe bananas, slice them and throw them in a skillet with melted butter, rum, cinnamon, and sugar.  Oh my!  I remember the first time I had Bananas Foster at a Mardi Gras themed party. and it made such an impression.  One that stuck with me.  The flavors are outstanding.


So this sundae is a play off of the original dessert.  Combining the flavors and then using them as a topping for vanilla ice cream.  The bomb if I do say so myself! 

Oh...and...
Truth be told I have a weakness for Ice Cream as well. 


Bananas Foster Sundae

Serves 2

2 T butter
¼ c packed brown sugar
¼ t cinnamon
½ t dark rum
2 T water
1 large banana, sliced
Vanilla Ice Cream

In a medium of medium heat, melt butter. Add brown sugar, cinnamon, rum and water. Stir to combine. Cook, stirring constantly, until sugar is melted. Add banana slices, and cook 1 minute. Serve over ice cream.


Thursday, March 14, 2013

Classic Irish Dishes for St. Patrick's Day

The luck o' the Irish is among us!

This is the biggest drinking day of the year they say...but it's also filled with so many wonderful food items that are typically Irish, and some that aren't. 

I recall a potluck at work one year to celebrate St. Patrick's Day we made the theme "GREEN".  Anything goes.  We had green bagels, green chips, guacamole, green enchiladas, you name it, if it was green, it was there.  So much fun!

I've cooked quite a few "classic" Irish dishes over the years, and some that aren't so classic.  Today I'd love to share them with you again to inspire you to make something special this weekend to celebrate the holiday.


St. Patrick's Day Cheddar Biscuits
Pioneer Spotted Dog
Chocolate Bailey's Milkshake
Potato Cakes
Irish Stew

 I'm getting hungry...
Erin go bragh!
Happy St. Patrick's Day!

Monday, February 11, 2013

Be My Valentine Dessert


The magic of  Valentine's day is upon us.  

How will you celebrate?  Will it be a lavish dinner out, or something quite at home.  Or perhaps not a dinner at all but a special day planned for the two of you.  We usually do something memorable such as a museum, or day out.  This year we're talking about attending a Flamenco concert...how passionate is that?

So in honor of that passion I thought I would bring you a dessert to make for your loved one that will knock their socks off.  I saw this wonderfully easy dessert over on Stonegable.  I absolutely love Yvonne's blog, so if you get a chance make sure to pop over and check it out for yourself.  She called it "Be My Valentine Dessert".  What a perfect name!  I knew I had to recreate it for MGG, and I did, and he loved it!


(see the medium and tiny puff hearts!  adorable...)

So here' my adaptation of her wonderful recipe.  It's very easy to put together.  The hearts are made from puff pastry, which you can make several days ahead and keep them in a storage bag.  Assembly on the big day is quick and easy.

I hope you and your loved ones enjoy this special treat.  I can't wait to make another one!!!


Look for a wonderful valentine breakfast muffin later in the week.  They'll put love in the forefront of your day!

Be My Valentine Dessert
adapted from Stonegableblog.com

serves 2

2 4" square puff pastry sheets, or 1 large sheet puff pastry
8 strawberries
1 T sugar
chocolate syrup
strawberry ice cream
whipped cream


Preheat the oven to 400 degrees.  Thaw puff pastry for 15 minutes.

In a small bowl, cut all but 2 strawberries and sprinkle with sugar. Gently mix and set aside.  Cut the 2 strawberries from the tip almost to the base in 5 slices and open like a fan.  Don't cut all the way through so the base stays together.

Place the puff pastry on wax paper on a work surface.  Using a large cookie cutter cut out 2 large hearts. You can also cut out several medium hearts, and several tiny heart for garnish.  

Put the pastry hearts on a parchment lined baking sheet. Leave a little room between each heart.  If the pastry is still cold you can now cook them.  If they are more like room temperature put them back in the refrigerator for 15 min, as cold puff pastry will puff better when cold.  

Bake at 400 degrees until they are puffed and golden, about 15 minutes.  The tiny hearts will only take about 10 minutes so if you are cooking those remove them after 10 minutes.  Cool the hearts completely. At this point they can be saved in an airtight container for several days.

To assemble: Gently cut the two largest puffed hearts in two.  I used a serrated knife so the pastry would not break.  Drizzle the chocolate syrup over the bottom of a small plate.   Put the bottom heart shell in the pool of chocolate and top with a scoop or two of the ice cream.  Place the sliced strawberries on top of the ice cream.  Add the top heart shell and drizzle a little syrup over the top.

Garnish with whipped cream, and a fan cut strawberry and medium and small heart puffs.  

LinkWithin

Related Posts Plugin for WordPress, Blogger...