Saturday, August 29, 2015

The Best Grilled Corn Ever!


I have to share a secret recipe with you....I've been keeping it hidden and I just feel guilty about it cause this is the BEST grilled corn you will ever eat!  Seriously!

I'm eating up all the summer corn I can get because the season is almost over.  If you are like me you love corn, and there's nothing better than sweet summer corn grilled on the cob!  

I know that there is a holiday coming up, so if you have a craving to serve grilled corn at your Labor Day cookout then this is the recipe/method for you!  This is my go to method and it has everyone that tries it salivating for more.  It's that good.


So simple, yet the corn ends up roasted, but steamed, and buttery as heck.  To die for!

Make sure to make this before the corn is all gone....the end is near  :(

Enjoy!


The Best Grilled Corn Ever

serves 6

6 ears of white or yellow corn on the cob, husks removed and cleaned
1/4 c butter
2 T chives chopped

Heat a gas or charcoal grill to medium.  Place corn on a piece of heavy duty foil, large enough to cover the corn in a package.  (2 pieces of regular foil maybe be used.)  In a small microwavable bowl place butter and melt on high 15-30 seconds until butter is melted.  Add the chives to the butter.

Brush butter over each ear of corn.  Pour any remaining butter over the corn.  Bring up the sides of the foil over to meet each other.  Make a tight 1/2 inch fold.  Keep folding down foil but allow some space for circulation.  Fold other sides to seal.  

Place packet on the grill over low heat.  Cover and cook 12-18 minutes, rotating and turning packet half way through. When ready to serve cut the foil and allow the steam to escape.  Serve.


Saturday, August 22, 2015

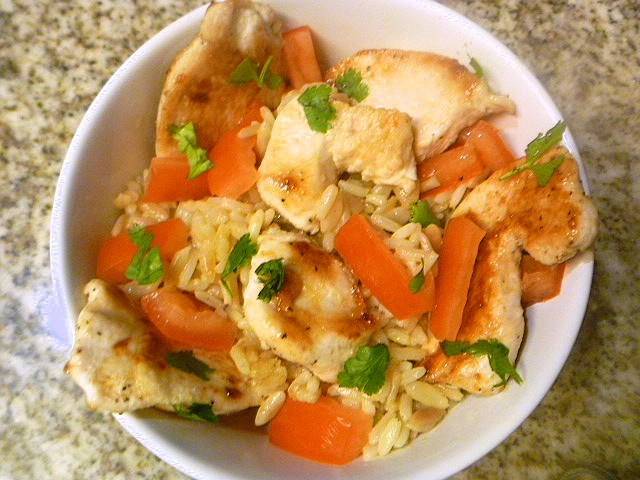
Bruschetta Chicken Rice Bowl


Italian Food is a favorite of mine.  Always has been.

It was a given that one day I would travel to Italy as I love the food, the people, the culture, and the history of this wonderful country.  I was blessed to be able to visit Italy with my mom quite a few years ago.  One of the best trips ever!

We stayed in Rome for a week and then we were off to Venice.  Rome is a wonderful city full of history and excellent food.  We were dying over all the food we ate.  We found a quaint restaurant near our hotel that we visited just about every day for either lunch, a snack, or dinner.  It was a family owned restaurant and we became quick friends with the owner, Giuseppe.  His son was living in California at the time, for college, which he was so proud of.  This commonality brought us together quickly and he became a wonderful friend during our stay.


Giuseppe made us feel so welcome in his restaurant, as if we were coming into his home.  The food was heavenly.  He usually had a special made entree which he would recommend and we greedily ate up.  However, every meal started out with a piece of Bruschetta.  Oh the flavors were to die for, the plump, juicy tomatoes, with pungent garlic mixed in, with a drizzle of olive oil and maybe some basil over a toasted baguette!  Oh my!  My mouth is watering just remembering that one delicious piece that opened your appetite.

My love of Bruschetta started there and has never left me. So today I wanted to take those flavors and adding some chicken for protein recreate them in the ever so popular rice bowl.  Everyone loves a rice bowl right?  So why not mix it up and create an Italian one with the outstanding flavors of Brushetta.  Simple, yet tasty.   I made a rice pilaf which provides you with more flavor, however, feel free to use brown rice, long grain white rice, or instant rice.  Anything will do really.  Enjoy this dish as the perfect lunch or dinner in 30 minutes.


Here's to you Giuseppe!


Bruschetta Chicken Rice Bowl

serves 4 

Rice Pilaf:

    1/4 c orzo pasta
    1 T unsalted butter
    3/4 c yellow onion, finely chopped
    Pinch of kosher salt
    1 c long-grain white rice
    1 1/2 c low-sodium chicken broth

    Chicken:
    2 boneless skinless chicken breasts
    salt & pepper
    1 tsp garlic powder
    2 T olive oil
    3 Roma tomatoes, seeded and sliced
    2 cloves of garlic, minced
    4 tsp fresh parsley, minced

    For the rice:  heat a small saucepan over high heat until hot. Add the pasta, and cook, stirring, until golden brown, about 1 1/2 minutes. Add butter and stir until melted.   Add onion and salt, stirring occasionally, until onion is translucent, about 2 minutes. Add rice, and cook, stirring, 1 minute.

    Add broth to the pan and bring to a boil. Reduce heat and simmer, covered, 15 minutes. Remove from heat; let pilaf stand, covered, 10 minutes. Fluff with a fork.
Meanwhile pound your chicken between two pieces of plastic wrap to an even thickness about 1/4-1/2".  Sprinkle both sides with salt, pepper, and the garlic powder.  Heat a medium skillet of medium-high heat.  Add the olive oil and allow to heat.  Add the chicken breasts and cook about 4-5 minutes total until cooked through and golden brown. Remove from the skillet and keep warm.  Add the tomatoes and garlic to the skillet and cook, stirring occasionally for 2 minutes until fragrant and heated through.  Slice the chicken in to strips or bite sized chunks.

To assemble the bowls:  Take 4 small individual bowls and place rice in the bottom filling up about 3/4 way up the bowl. Add chicken and tomato/garlic mixture.  Sprinkle with chopped parsley. Serve.

Saturday, August 15, 2015

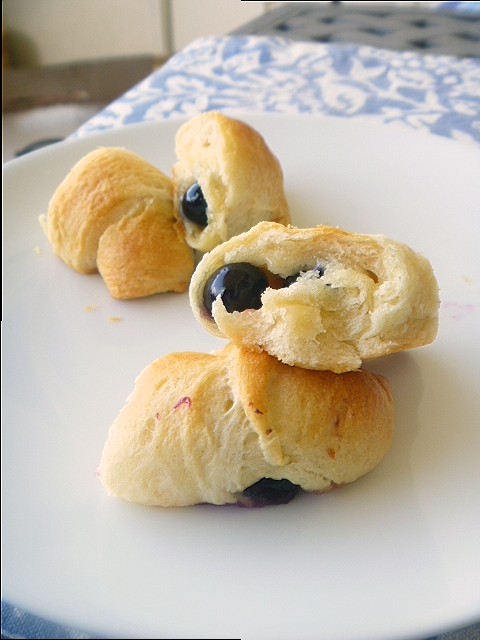
Lemon Blueberry Crescent Rolls


We're on our way out to the beach!  I love the beach but I don't get there as often as I'd like.  So today is special.  It's a beautiful day, very hot, but the cool ocean breezes and the sandy beaches are waiting for us.  


We have a lot of beaches to choose from around us such as Zuma Beach, Malibu Beach, and Santa Monica Beach to name a few.  Our favorite has become Will Rogers State Beach.  It's a wonderful spot that isn't very wide so we don't have to truck all our stuff far from the car in the 'hot' sand. It's quiet and the water is always sparkling.  The perfect spot to watch dolphins playing, which we had the pleasure of seeing quite often. 


We'll pack a light lunch and some fruit to snack on, but before that I'm making a quick breakfast.  


I mean really quick!  This isn't even a recipe.  Just something I threw together with pantry staples.  I always keep crescent rolls on hand because you can make so many things with them.  For the filling I always have berries on hand in the summer.  I chose some plump blueberries, which I adore hot blueberries.  They are bursting with flavor.  What goes good with blueberries? Lemon curd.  Done! You have your filling.    


This is to be a simple breakfast, so help from convenience items such as jarred lemon curd and crescent rolls is perfectly ok.  And....they are delishhhh!


So we're off to the beach now.  We (MGG actually) ate all the Lemon Blueberry Crescent Rolls with the exception of two that I hid for a late night snack!  He didn't notice....I think. 

Have a great weekend and try these quick breakfast treats. You'll love them!


Lemon Blueberry Crescent Rolls

makes 8

1 can of refrigerated crescent rolls (I used Pillsbury)
4 T of jarred lemon cured (more or less as you desire)
1/2 pint of fresh blueberries

Heat oven to 375 degrees.

Unroll crescent rolls and separate each triangle.  Brush lemon curd over each triangle.  You can use more or less to your taste.  Drop 3-4 blueberries on each of the triangles closer to the wide end.  Roll up starting from the wide end and creating a crescent roll.

Place on a baking sheet with parchment paper.  Bake 8-10 minutes until golden brown.  Serve.


Friday, August 14, 2015

Baja Chicken Sliders


We are in the hottest part of summer around here in Southern California.  But that doesn't stop us! I've been in the mood for a party, how about you?

So last weekend we had a wonderful party that was beside the pool, with alfresco dining, and great grilled food.  

Here was the menu:
Cherryade
Summer Corn Salad
Summer Salad
Baja Chicken Sliders
Strawberry Banana Parfaits


There's nothing better that getting together with friends and sitting around the table telling stories. This is what life is all about.  Sharing stories and laughter.  Lots of laughter!


So today I wanted to share with you our main dish recipe. Baja Chicken Sliders are a wonderful handheld item with bold flavors.  I found and adapted this recipe from Taste of Home and I'm so glad I tried it because boy, does this dish 'wow' you!  Everyone at our party just loved it.  Don't you love it when everyone brags about your food? Haha!  I do!

Everything from the sauce to the slaw just 'works'.  Don't skip anything on this because each item lends to the final dish and gives it it's flavor boost.  It's soooo good!


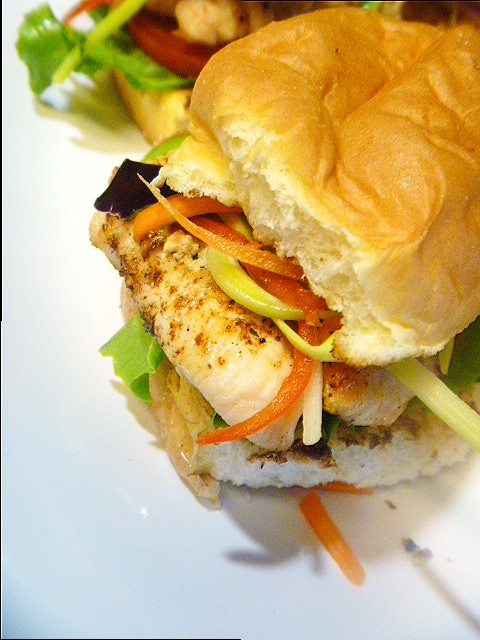
Look how yummy this dish is!  Succulent chicken breasts with a tangy sauce and spicy slaw on a sweet toasted bun...nothing better!  

It's easy to prepare, and perfect for serving multiple people. This would be the perfect dish for your Labor Day party....Enjoy!


Baja Chicken Sliders

adapted from Taste of Home
serves 8

Sauce:
1/4 c low fat sour cream
1/2 tsp grated lime peel
1/4 tsp lime juice

Slaw:
1 c broccoli slaw mix
1/2 red bell pepper, julienned

1/4 small red onion, sliced
2 T fresh cilantro, chopped
1 jalapeno pepper, seeded and julienned
2 tsp lime juice

Sliders:
4 boneless skinless chicken breast halves (4 ounces each)
1/2 tsp ground cumin
1/2 tsp chili powder
1/4 tsp salt
1/4 tsp fresh ground black pepper
8 Hawaiian sweet rolls, split
8 small lettuce leaves
8 slices tomato

Preheat grill to medium high.  

In a small bowl, combine sour cream, lime peel and lime juice.  In a medium bowl, combine slaw ingredients. Chill sauce and slaw until serving.

Cut each chicken breast in half widthwise; flatten to 1/2-in. thickness by pounding between plastic wrap with a meat pounder or rolling pin.   Mix seasoning of cumin, chili powder, salt, and pepper in a bowl, then sprinkle chicken.

Coat grill rack with cooking.  Grill chicken, covered, over medium heat 4 to 7 minutes on each side or until no longer pink.

Grill rolls, cut sides down, 1 minute or until toasted. Serve chicken on rolls with lettuce, tomato, sauce and slaw.


Sunday, August 9, 2015

Grilled Vegetables: A Summer Staple


We all love to fire up the grill during the summer.

Vegetables as a side dish is a no brainer and Grilled Vegetables is just a summer staple.  At least at my house it is.  Grilling vegetables brings out the natural sweetness and makes them taste deliscious (sorta like roasting does, but more intense).  Combine that with a great little marinade to pump up the flavor a notch and you have a go to recipe that you will make over and over again, until summer ends. Maybe even longer!


This recipe combines a variety of vegetables in one dish.  It's great displayed on a platter and the perfect entertaining side dish.  You can use any vegetables that you want.  I just used some basic vegetables I had on hand including carrots.  Yes, you can grill carrots!  They come out fabulous.

The key to grilling different vegetables is making sure you have a grill pan for the smaller ones that have a tendency to want to fall through the grates when you aren't looking!  A nice mesh pan works great for mushrooms, asparagus, snap peas etc. Another key is to add the items that take the longest grilling time first, then add the others in succession so they all end up done around the same time.


We served this along side a wonder steak recipe that I'll be posting shortly.  A nice piece of grilled bread and you are all set.

I hope you enjoy this.  Don't skip the marinade cause it's wonderful!  It's sweet and tangy and really adds some zip to your dish.

Enjoy!


Grilled Vegetables

serves 4-6

1/4 cup olive oil
2 T honey
4 tsp balsamic vinegar
1 tsp dried oregano
1/2 tsp garlic powder
1/8 tsp pepper
1/2 tsp kosher salt
1 lb asparagus, woody stems trimmed
3 carrots, cut in half lengthwise
1 red pepper, cut into 1-inch strips
1 yellow summer squash, cut into 1/2-inch round slices

In a small bowl, whisk the olive oil through the salt.  Put 3 tablespoons of the marinade in a plastic bag.   Add the vegetables, seal and turn to coat.  Marinate 1-1/2 hours at room temperature.

Heat grill to medium heat.  Transfer vegetables to the grilling grate or using a grill basket.   Grill covered, for about 12-15 minutes or until crisp-tender, turning occasionally.

Place vegetables on a platter.  Drizzle with remaining marinade. 


Saturday, August 1, 2015

Cherry Garcia Scones


I have fond memories of my first encounters with Ben & Jerry's Ice Cream.

I remember laughing at the puns in the titles.  All the 'stuff' they added to the ice cream to make some awesome new flavors.  This ice cream flew into the stores with such a force it became an in-thing to eat Ben & Jerry's, and to try all the different flavors.

Some of my initial favorites were Half Baked, Chunky Monkey, and of course Cherry Garcia!  Oh that cherry flavored ice cream loaded with real cherries and fudge bits. They really had me at cherry. One of my favorite fruits of summer.  I wait patiently each year for cherry season to start, and then I pounce!  Buying bags of cherries weekly during the short season.

Cherry Garcia Ice Cream is my inspirations for this week's recipe for a heavenly scone.  It has all the flavor of the ice cream; fresh cherries, chocolate bits, cream for a soft moist interior.  It's a flavor combination that can't be beat.   


Now you may be saying...geez, I have to pit all thoses cherries?  Well not to worry. There is a wonderful gadget for that.  I use Oxo's Cherry and Olive pitter.  I picked mine up from Williams-Sonoma, here for $12.95, or you can find it on Amazon, here. Wouldn't be without this little beauty!

You will notice that I grate the butter into the flour mixture instead of the usual cutting in the butter with two knives or a pastry cutter.  I saw this technique on the TV when this chef was making biscuits so I decided to try it out.  I will say that I loved this technique.  It's very easy to do and the butter seems to get more distributed amongst the dough.  I will be grating my butter in many of my recipes going forward.  Try it and let me know if you like it.


You will absolutely love these scones.  Make them this weekend for a nice treat.  Enjoy!


Cherry Garcia Scones

Makes 12

             2 cups all purpose flour
             1/2 cup sugar
             1 teaspoon baking powder
             1/4 teaspoon baking soda
             1/2 teaspoon salt
             1 teaspoon vanilla
             8 oz butter, frozen
             1/2 cup fresh cherries, chopped
             1/3 cup chocolate chips
             1/2 sour cream
             1 egg
     
Pre-heat oven to 400 degrees.

In a medium bowl mix flour, sugar, salt, baking soda and baking flour.  Grate frozen butter into flour mixture. Mix with fingers until flour resembles small pebbles or peas. Stir in vanilla, cherries and chocolate. Loosely mix together.

In a small bowl whisk together sour cream and egg.  Add to the flour mixture and stir until just combined.  Form dough into a disc.  Place the disc on a floured surface and pat into an 8 " or 9" circle about 1/2 inch thick.  Using a sharp knife or pizza cutter to cut into 12 triangles. Place each scone on a parchment lined baking sheet, 1 inch apart. (I used two baking sheets)  Bake 15 min or until golden brown.  Cool.
   

LinkWithin

Related Posts Plugin for WordPress, Blogger...