Tuesday, January 10, 2012

Taco Salad


A "healthy new you" in 2012 brings out the salads in me.


I love a good salad.  I didn't used to.  To me salads never tasted as good when I made them...but they tasted excellent when someone else made them!  But salads lend you a creative outlet.  You can make so many variations and turn them in to something unique and delicious.


This particular salad is one that my friend Kayle taught me how to make a long time ago.   It's very forgiving, so you can change up the ingredients to utilize what you have on hand.  This is also a perfect salad for "pantry shopping" since you can use items your store.


So, I will give you the basis for my Taco Salad that I made, as well as some other options for substitutions.


Start with making some taco meat using my taco seasoning.


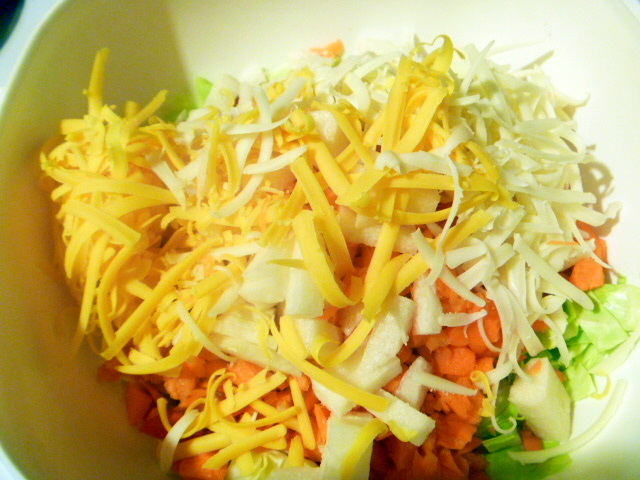
In a large bowl place a chopped head of cabbage.  TIP: using cabbage rather than lettuce, lends this salad great crunch, and allows you to keep the salad mixed together for several days and it won't get soggy!


Add, chopped tomato


Add chopped or shredded carrot


Then you can add slice jicima


Then add shredded cheese - I used both cheddar and monterey jack.


Add the taco meat


Stir all together


Place on individual salad plates and top with broken tortilla chips and Catalina dressing.


YUM!


Other salad variations:


Pinto beans
Black beans
Kidney beans
Garbanzo beans
Cucumber
Corn
Red Bell Peppers
Pepper Jack cheese
Pepitas

Enjoy your salad, be creative, and eat well!


Sunday, January 8, 2012

Marshmallow Muffins


My love of muffins continues with a great recipe for Marshmallow Muffins.  Yes, I said marshmallow!


I love marshmallows...the taste, smell, stickiness.  I love it in ice cream, hot chocolate, s'mores, brownies, so why not in muffins?


I do have to warn you, these muffins are not overly sweet.  They have a definite darker chocolate flavor.  So if you like them sweet then you might want to add more sugar, or try one of my other muffin recipes.  You would think that the marshmallow lend more sweetness to the muffins, but alas...they don't.  So remember, I told you...these are not a prominently sweet muffin!


So being that they are unique with marshmallows and not overly sweet they are perfect for tea time or with a cup of coffee, or as an afternoon snack.


Hope you try these out!


First you want to take your mini marshmallow and cut them in half, making tidbits.  Place these in a small bowl and set aside.


Mix your dry ingredients together in a medium bowl.  (Flour, cocoa, baking powder, and salt)


Add your brown sugar and marshmallow tidbits.  Toss to coat the marshmallow in the flour mixture.  This will help them stay afloat in the muffins and not fall to the bottom.


In a small bowl combine your we ingredients (eggs, milk, oil) whisking to blend.


Add the wet ingredients to the dry ingredients.


Mix just until moistened.  Do not over mix.  Add your batter to a prepared muffin pan.  I used cooking spray and I use an ice cream scoop for the batter.  It really does work best and gives you the perfect amount.


Bake in a preheated oven at 400 degrees for 18 minutes.  Cool for 5 minutes in the pan, then turn out on to a wire rack to finish cooling.


Enjoy!


YUM!


Marshmallow Muffins

Serves 12

1 c mini marshmallows
1 ½ c flour
½ c unsweetened cocoa
1 T baking powder
1/8 t salt
½ c packed brown sugar
2 eggs
1 c milk
6 T canola oil

Preheat oven to 400 degrees.

Cut each of the mini marshmallows in half and place in a bowl.  In a medium bowl combine your flour, cocoa, baking powder, salt, and brown sugar.  Add cut marshmallows and stir.  Make a well in the middle of the flour mixture.

In another small bowl combine eggs, milk, and oil.  Whisk to blend.  Add egg mixture to dry ingredients and stir just until combined.

Spoon batter into a 12 cup muffin pan that has been prepared with cooking spray.  Bake for 18 minutes.  Muffins should be well risen and firm to the touch.

Cool in pan for 5 minutes.  Remove from pan and cool on a wire rack.  

Friday, January 6, 2012

Greek Lemon Chicken and Rice


A friend of mine brought me a bunch of lemons from her tree the other day.  They are fabulous!  Nice big plump lemons with that bright citrus flavor.  
  
Don't you just love lemons?  They are so versatile.  You can make lemon bread, use them in a salad dressing, sprinkle them over vegetables, and of course, why we are here...enjoy them with dinner as in my Greek Lemon chicken and Rice!

This is a great weeknight meal the whole family will love.  What's better than a kid-friendly 30 minute meal?  With basic ingredients that you most likely have on hand you can whip this super simple meal together quickly.  Just add a nice green vegetable and you're set!  


As part of my New Year's "intentions" I've started using items that I have on hand...stockpiled if you would.  It's called Pantry Shopping.  Where you shop from you pantry or freezer to make your meals, rather than buying new items.  This allows you more creativity in putting a meal together, and allows you to use that "stockpiled" food.    The benefit in all of this?  Money savings baby!


So I pulled my chicken breasts from the freezer, got out some rice I had on hand, and used my girlfriend's lemons.  Don't let the simple recipe fool you, the flavors pack a big punch to the chicken.  So come on and try this dish, you'll love the flavors!  And, if you're feeling the need to save a little money and have a stockpile of food like I do, try Pantry Shopping.  It's a good "intention" to have!


What are your favorite lemon dishes?


Greek Lemon Chicken and Rice

Serves 4

3 T lemon juice
2 t olive oil
3 minced garlic cloves
¼ t oregano
2 boneless skinless chicken breasts, butterflied to make cutlets
1 T olive oil
Salt & pepper
2 cups cooked brown rice

In a deep sided tray or plastic bag mix together lemon juice, olive oil, garlic and oregano.  Add chicken and coat with marinade.  Marinate chicken in the refrigerator for 30 minutes. 

Add oil to a large skillet and heat of medium high heat.  Remove chicken from marinade and season with salt and pepper.  Reserve remaining marinade.  Add chicken to the skillet and cook 5-6 minutes per side, or until done.  Add reserved marinade.  Increase heat and boil marinade with chicken for 1 minute.  Make sure it boils, this will kill any bacteria.  If you prefer not to add the reserved marinade you can make extra marinade and set some aside in a bowl instead of using it to marinade with.

Serve chicken with sauce over brown rice.


Recipe has been linked up to:


LinkWithin

Related Posts Plugin for WordPress, Blogger...