Wednesday, August 10, 2011

Family Recipe Spotlight: Sue's Deep Dish Georgia Peach Cobbler


It's been quite a week around here, but I'm off to visit my family for a couple of days!!

I wanted to give you a taste of the south before I leave.  So today's post will be a Family Recipe Spotlight!

This dish comes all the way from the quaint town of Franklin, TN...just south of Nashville.  Talk about the south ya'll. 

What's better than Peach Cobbler??......how about Deep Dish Georgia Peach Cobbler!

Her inspiration came from our darling Aunt Charlotte who loved to make peach cobbler. Memories of eating her warm cobbler fill our hearts!
My sister, Sue is a wonderful cook.  One of those that just makes recipes up and they come out fantastic!  (Don't you just hate that!!!)  What a gift...and she was kind enough to share this tasty recipe with me, to give to you....so special!!


Let's make Deep Dish Georgia Peach Cobbler.

First you make your dough.  Mixing flour, butter, and salt until it looks like peas.  Adding your water to form the dough in to a ball. Divide the dough in two sections, one for the top and one for the bottom.  Rolling them out.  Place the bottom in your baking dish crimping the edges to make it look pretty!

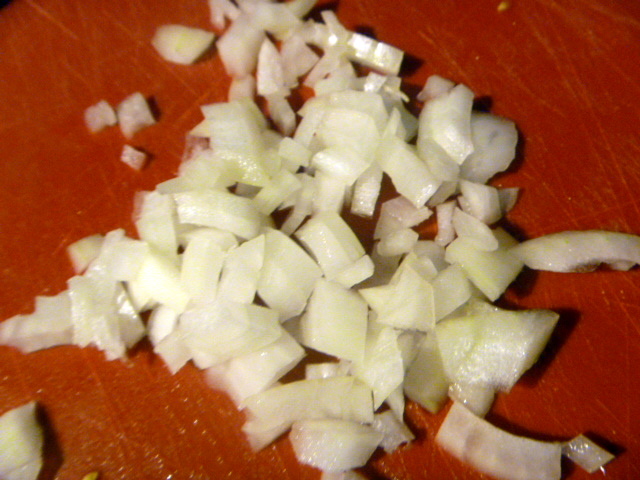
Next, peel your peaches and cut into 1/2" thick slices placing in a large bowl.  Look at these wonderful peaches!! OMG!


Blend together brown sugar, granulated sugar, cinnamon, salt. Folding over gently in the bowl and adding the cornstarch.

Spoon the peach mixture into the deep dish pie crust. Dot with butter (about 1 tbsp on top of peach mixture. 


Next, roll out the dough for the top.  Carefully place it over the top trimming the edges.  Create a decorative trim around the sides.  Cut some slits in the dough for the steam. Brush the crust with the beaten egg, then sprinkle the top with the raw sugar.


Bake at 425* on lower oven rack for 15 minutes. Then reduce the oven temp. to 375* and bake for about 35-40 more minutes. Cover loosely with foil to keep from burning on the edges and bake for another 25 minutes or until juices are thick and bubbly.    Wooooweeee!


All I gotta say is that she better have saved me some!  And I'll take mine with ice cream please!!!


Now THAT'S some Peach Cobbler! Thanks Sue for another great recipe!


Sue's Deep Dish Georgia Peach Cobbler Recipe

CRUST (top & bottom)
41/4 C Flour
1 1/3 C cold Butter cubed
1 1/2 tsp Salt
3/4 C ice water

Peach Filling:
8 large ripe Georgia Peaches, peeled and sliced
1/2 C packed light brown sugar
1/3 C granulated sugar
1 tsp cinnamon
1/8 tsp. salt
1 Tbl cornstarch
1 1/2 tbsp. butter cut
1 egg beaten to brush on crust
1 1/2 tbsp raw sugar to top crust

To make the crust:
Stir in large bowl flour, butter and salt. Blend till mixture looks like peas. Slowly add water until ingredients are moistened and dough begins to form a ball adding more ice water if needed.
Divide tough into two sections for top and bottom. Roll out each one on a floured board to about 1/4" thick. Place the first crust into the bottom of a deep baking dish 7x10. Crimp the sides of the crust to form a scallop effect on the edges. Repeat the same with the dough for the top, crimping the edges.

Peach filling:

Preheat oven to 425*.  Peel peaches and cut into 1/2" thick slices placing in a large bowl. 
Blend together brown sugar, granulated sugar, cinnamon, salt. Folding over gently in bowl and adding the corn starch.
Spoon the peach mixture into the deep dish pie crust. Dot with butter (about 1 tbsp on top of peach mixture.
Carefully place second pie crust over the top using the rolling pin. Cut off excess dough around the edges and form the decorative edge of the crust.
Cut 3-5 slits on the top crust so that steam can escape. Brush the crust with the beaten egg, then sprinkle the top with the raw sugar.
Place on a cookie sheet or jelly roll pan into pre-heated oven.  Bake at 425* on lower oven rack for 15 minutes. Then reduce the oven temp. to 375* and bake for about 35-40 more minutes. Cover loosely with foil to keep from burning on the edges and bake for another 25 minutes or until juices are thick and bubbly.
Place on rack to cool.

Enjoy it warm with ice-cream!

Tuesday, August 9, 2011

Fast & Fresh: Grilled Chicken and Avocado Pitas


The other night MGG (my greek god...) and I whipped up a great dinner.

It was pushin' 100 degrees outside and it was getting late, so we wanted something that was quick and light!

So we decided upon my Grilled Chicken and Avocado Pitas.  How often do you turn to a sandwich for a light dinner?

Sandwiches are great to make.  They are so versatile and lend a blank canvas for mounds of creativity!  Just think of all the types of bread there are to set the scene...ciabatta, sourdough, tortilla, naan, country wheat bread, and pitas!

So many options...endless opportunity!

And the best part is that it's full of flavor, quick, doesn't require an oven, light, and fresh.  It's my newest Fast & Fresh entry!

My Grilled Chicken and Avocado Pitas are a little Asian in flavor, using a wasabi mayo for the spread. 

Wow, what a spread!  Spicy and creamy, with a hint of soy!

Grilled chicken, avocado, tomato, and green leaf lettuce round out the ingredients.  This sandwich packs a punch!  Great for a picnic, lunch, dinner, on the go...you get the idea!

Hope you love this dish...it's easy to make, and you can't beat that!

First let's make the spread.  In a small bowl stir together your mayo, wasabi paste, soy sauce and rice wine vinegar.  Stir, Stir, Stir.   What's wasabi paste you ask?  It's sorta like Japanese horseradish. The green stuff they serve with Sushi.  Here what it looks like...!


You should have a nice creamy spread.  You will need to put this in the frig until time to use.


Next you will want to grill some chicken.  Seasoning with salt and pepper.  The chicken doesn't need a marinade as the flavor is in the spread and you don't want to detract or compete with that.  (more on the asparagus later...!)  I used tenders so they would cook faster.


Then as this is grilling prepare your add ins.  Sliced tomato, green leaf lettuce.  And leave the diced avocado until the end so it doesn't turn.  (or dice now and sprinkle with lemon juice).


Heat your pitas to warm them, on the grill for just a few seconds, or in a dry skillet turning them over until warm.

Cut your grilled chicken into bite sized cubes.  Assemble your sandwiches by cutting the pita in half and opening the pockets up.  Place the spread on both of the insides of the pita.  Add green leaf lettuce, your cubed chicken, sliced tomato, and diced avocado.

Voila!  You're done and it's fantastic!!! 


MGG ate his so fast that I hardly had one bite down and he was looking for seconds!!!


Enjoy!


Grilled Chicken Avocado Pitas

Serves 4
Ingredients
1 tablespoon wasabi paste
2 teaspoons soy sauce
2 teaspoons rice vinegar
1/2 cup mayonnaise
1/2 pound boneless chicken breasts
Salt & pepper
2 pita breads
1 ripe avocado, diced
4 leaves of green leaf lettuce
1 medium tomato, seeded and sliced

 
Directions

In a small bowl, combine the wasabi paste, soy sauce, vinegar, and mayonnaise. Refrigerate until use.
Sprinkle salt and pepper on both sides of chicken breasts. Cook chicken on a preheated grill over medium-high heat about 6 minutes per side until fully cooked, with the lid down.  Remove from grill.  Toast your pita breads until tender and heated, about 1 min.  If you leave them to long the pita will turn crispy.

Cut chicken into 1 inch cubes.  Cut pita rounds in half and spread some wasabi mayo on both of the insides.  Fill each pita half equally with green leaf lettuce, chicken, avocado, and tomatoes. 


Linked to: Let's Break Bread Together 


Sunday, August 7, 2011

Fast & Fresh: Heirloom Cherry Tomato and Grilled Corn Salad


Boy, do I have a treat for you...I can hardly wait I'm busting!

As part of my Fast & Fresh series I'm going to share with you one of my favorite summer side dishes!
I know that you will just love this salad, as the flavors are bright, fresh, light, and flavorful!

My Fast & Fresh series are great recipes that you can use to "beat the heat" in the kitchen.

"Fast & Fresh"

This salad uses fresh heirlooms cherry tomatoes, and grilled corn.  Grilling the corn lends a charred but sweet flavor.  The dressing uses fresh lime juice which just brightens the whole salad up!  This salad is great for your grill night, a picnic, pack it for lunch at work...it's wonderful all by itself!  The flavors...YUMMY!

Let's make it...

Husk your corn, and rub it with a little olive oil, salt and pepper.  Place it on a grill that's been heated to medium heat.  Close the lid and rotate the corn often to obtain the char on all sides.

Let the corn cool enough to handle.  Then you want to remove the kernels from the cob.  I used a colander to stand the corn cobs in and run my knife downwards against the cob removing the kernels.


I put the corn in a medium sized bowl and then I run the dull side of the knife down the cob to get some of the milk out and in to the bowl.

Take a pint of your cherry tomatoes and cut them in half.  Add to the bowl.


Add your diced onion, (I like a sweet onion for this), chopped parsley, and minced jalapeno to the bowl. 


Now you want to make the dressing.  Mix the juice of one lime with a 1/4 cup of olive oil.  Whisk together.  Add salt & pepper to taste. (the lime is a key flavor here!!)

Pour this over your salad and toss, toss, toss.  Get everything covered with the dressing.


Place in the frig and allow the flavors to blend....blend!


Sooooo fresh and light!!!  This is money!!


Heirloom Cherry Tomatoes and Grilled Corn Salad

Serves 4-6 as a side dish

2 ears corn, husked
1 pint heirloom cherry tomatoes, halved
1/4 cup Vidalia onion, diced
1/4 cup flat leafed Parsley, chopped
1/2 jalapeno pepper, minced
1/4 cup olive oil
juice of one lime
salt and pepper, to taste


Rub the husked corn with a little olive oil, salt, and pepper.
Place corn on outdoor grill over medium heat and cook, turning,
until some of the kernels are a little blackened.
Let corn cool enough to handle. Remove the kernels from the cobs
by standing cob on one end and using your knife to slice downward.
Be sure to then use the dull side of the knife blade to scrape off
the "milk". Place in a medium sized bowl.


Add the rest of the chopped and minced ingredients in the bowl
with the corn.


Add lime juice to a small bowl. Add salt and pepper to taste.
Whisk and add olive oil in a slow drizzle to emulsify. Taste for
seasoning, and adjust as necessary.


Pour over the salad and toss to mix well.  Place in the refrigerator for 30 min to allow flavors to blend.

LinkWithin

Related Posts Plugin for WordPress, Blogger...