Showing posts with label salami. Show all posts

Tuesday, October 20, 2026

Portable Autumn Picnic Board


This Portable Autumn Picnic Board is filled with meats, cheeses, fruit, and savory bites for an easy, no-cook lunch at the park or outdoor gatherings.


Portable Autumn Picnic Board


Weekends around our house often include some version of a Mediterranean lunch plate. Either a board filled with a little cheese, some savory meats, olives, fresh fruit, and something crunchy to nibble on, or a hot skillet dish that perfect for scooping onto crusty bread. It's one of our favorite ways to enjoy a relaxed lunch without spending much time in the kitchen.

When early fall rolls around, though, we love taking that same idea outdoors. There's something wonderful about packing up a picnic, heading to the park with our dog Bogie, and enjoying a beautiful autumn afternoon. I love spreading a plaid table scarf over a picnic table, setting out some delicious food and refreshing drinks, and settling in to enjoy the fresh air and a little time away from home.

That's how this Portable Autumn Picnic Board came together. I took some of our favorite snacks and gave them a seasonal twist with an assortment of cheeses, savory meats, sweet dates, juicy grapes, fig jam, crackers, and other little bites. Everything is arranged in a handled ceramic serving dish, then wrapped snugly for the trip so it's ready to enjoy when we arrive.

It's colorful, delicious, and wonderfully uncomplicated. There's no cooking, no elaborate preparation, and no fussing with the food once you get there. Just unwrap, set it on the table, pour something refreshing to drink, and enjoy a leisurely fall picnic. And the best part? This little portable spread works just as beautifully for a beach afternoon, an outdoor concert, or a casual gathering with friends.

Enjoy!


Ingredients

Building Your Autumn Picnic Board

The beauty of a picnic board is that there really aren't any rules. Start with a few favorite cheeses and meats, add something fresh and something crunchy, and finish with a little sweetness. Here's what went into my autumn picnic board.

What I Used on My Board

Cheeses

  • Havarti Dill Cheese: Creamy, mild, and wonderfully flavorful with its little flecks of dill.

  • Cheddar Cheese: A familiar favorite that adds a slightly sharper contrast to the Havarti.

Meats

  • Salami: Savory and full of flavor, perfect for pairing with cheese and crackers.

  • Sliced Turkey: A lighter, mild option that balances the richer salami.

Bread & Crackers

  • Sliced Baguette: A rustic addition that's perfect with cheese or a little fig jelly.

  • Parmesan Rosemary Crackers: Crisp and savory with delicious herbal notes.

  • Town House Crackers: Buttery, flaky crackers that everyone loves.

Fruit & Nuts

  • Medjool Dates: Naturally sweet and wonderfully chewy, bringing a little autumn richness.

  • Fresh Grapes: Juicy and refreshing between bites of cheese and meat.

  • Almonds: A satisfying crunch that fills in those little spaces on the board.

Savory Extras & Finishing Touches

  • Fig Jelly: A lovely sweet addition that pairs beautifully with cheese and crackers.

  • Kalamata Olives: Briny and bold, adding a Mediterranean touch.

  • Fresh Basil Sprigs: A little greenery for color, freshness, and a beautiful finishing touch.


Make It Your Own: A Mix-and-Match Picnic Board Guide


Equipment: My Picnic Essentials

You don't need special equipment to create a beautiful portable board. A few practical pieces make arranging, packing, and serving much easier.

  • A handled ceramic serving dish or shallow tray: I love using a dish with handles because it's easy to carry and makes a pretty presentation right on the picnic table.

  • Small bowls or ramekins: Perfect for olives, fig jelly, or anything that might spill or spread onto the other ingredients.

  • Plastic wrap or a fitted lid: Keeps the arrangement together during transport.

  • A small cheese knife or spreader: Handy for serving soft cheeses and fig jelly.

  • An insulated picnic bag or cooler with ice packs: Essential for keeping the meats and cheeses properly chilled.

  • A plaid table scarf or picnic blanket: Not essential to the food, of course, but it makes the setting feel wonderfully autumnal!


Let's Make It Together

This is one of those projects that's just as enjoyable to put together as it is to eat. I start by placing the small dish of fig jelly on my serving tray. This helps provide structure to your platter and gives me a place to build around.

Next, I tuck in the salami and folded turkey slices along the side of the jelly bowl in a river-like flow.  This will help the meat stand up in a pretty design.  Then comes the cheese placed in 3 different sections, followed by the baguette and crackers tucking them along the rims of the dish. Then comes the fun part—filling all those little spaces with grapes, dates, and almonds. A few fresh basil sprigs add a pretty finishing touch.

Once everything looks inviting, I wrap the dish snugly, pack it into a cooler, and we're ready to head out. When it's time for lunch, all that's left to do is uncover the board and enjoy!


The Secret to a Perfect Portable Picnic Board

The trick to a picnic board that travels well is to arrange everything snugly without overcrowding it. Start with the larger items, tuck smaller ingredients into the spaces, and keep anything wet or sticky in its own little container. A shallow serving dish that is covered tightly with plastic wrap or a container with a secure cover helps keep the arrangement intact.  Keep the board chilled until you're ready to serve, and you'll have a beautiful spread that looks almost as good at the park as it did in your kitchen.


Add Your Touch

One of my favorite things about a picnic board is how easily it changes with the occasion.

Think Outside the Charcuterie Board!  To make your plate easily portable you'll want a vessel with a little bit of a lip on the sides so items stay contained within when transporting.  Flat boards may not hold up as well to traveling as items may shift or fall off the edges.  Think baking dishes, serving trays that have handles, or smaller aluminum baking trays.  Here are some examples.  


For an Autumn Afternoon: Add crisp apple slices, fresh pears, fig jam, toasted pecans, and aged cheddar for those cozy harvest flavors.

For a Mediterranean-Inspired Lunch: Include feta, hummus, pita wedges, Kalamata olives, marinated artichokes, cucumbers, and roasted peppers.

For a Beach Day: Keep things light and refreshing with turkey, mild cheeses, grapes, berries, crackers, and fresh vegetables. Pack everything well chilled and protected from the sand.

For an Outdoor Concert: Choose easy finger foods such as cubed cheeses, rolled meats, sturdy crackers, grapes, and nuts. Keep the spread simple so everyone can nibble without much fuss.

For a Casual Gathering: Make a larger board with extra cheeses, meats, seasonal fruits, and a few different spreads. It's an easy centerpiece that encourages everyone to gather around and graze.


Set the Mood

Meals taste even better when the table feels inviting.  Here are a few simple ways to set the mood for this recipe.


There's something so enjoyable about taking an ordinary weekend lunch and turning it into a little outdoor occasion. A pretty table covering, a delicious assortment of favorite foods, and a beautiful fall afternoon are really all you need.

I hope this Portable Autumn Picnic Board inspires you to pack up a few favorites, head outdoors, and enjoy a leisurely lunch of your own. Whether it's a quiet afternoon at the park, a beach picnic, or a casual gathering with friends, sometimes the simplest meals create the nicest memories.

If you love relaxed Mediterranean-inspired flavors, you might also enjoy my Mediterranean Quinoa Salad or Farmstand Corn & Orzo Salad with Arugula for another fresh and flavorful lunch idea.


Before You Start

How far ahead can I assemble the picnic board?
You can prepare many of the ingredients the day before. Slice the cheeses, portion the meats, wash and thoroughly dry the grapes, and gather the crackers and nuts. For the freshest appearance and texture, arrange the board shortly before heading out. If assembling in advance, refrigerate it covered and add the crackers just before serving.

How do I keep a picnic board cold while traveling?
Pack your covered board in an insulated cooler with plenty of frozen ice packs. Keep perishable ingredients at 40°F or below until serving. Once the board is out, don't leave perishable foods unrefrigerated for more than two hours, or one hour when temperatures are above 90°F.

What's the best way to transport a charcuterie-style picnic board?
A shallow, sturdy serving dish with handles works beautifully for short trips, provided it fits securely inside your cooler. Wrap it snugly with plastic wrap or use a fitted lid. Place small containers around ingredients that could shift, and keep the dish level during transport.

What foods should I pack separately?
Crackers, bread, and delicate crispy items are best packed separately if the board will travel a long distance. Be mindful of juicy fruits, olives, or any item that can give off moisture and cause other items to become soggy.  

Can I make a vegetarian picnic board?
Absolutely! Skip the meats and add extra cheeses, hummus, roasted vegetables, marinated artichokes, nuts, fresh fruit, and a selection of breads or crackers. Choose vegetarian cheeses if needed.

How much food should I plan per person?
For a picnic board served as lunch, plan approximately 3–4 ounces of cheese and 2–3 ounces of meat per person, along with bread, crackers, fruit, nuts, and other accompaniments. For an appetizer board, you can use smaller portions.


Tuesday, June 16, 2026

Italian Picnic Sandwich for a Crowd


Italian Picnic Sandwich for a Crowd is an easy make-ahead sandwich loaded with Italian deli meats, fresh mozzarella, basil, tomatoes, artichokes, and greens. Perfect for summer picnics, beach days, pool parties, and feeding a crowd without turning on the oven.


Italian Picnic Sandwich for a Crowd 


Summer is the season of feeding people without heating up the kitchen.

Whether it's a beach day, lake trip, backyard gathering, concert in the park, road trip lunch, or an afternoon by the pool, I always find myself looking for recipes that can feed a group without requiring hours of prep or standing over a hot stove. During the hottest days of summer, recipes that don't require turning on the oven are worth their weight in gold. That's exactly where this Italian Picnic Sandwich for a Crowd comes in.

Layered with Italian deli meats, fresh mozzarella, basil, tomatoes, marinated artichokes, and crisp greens, it's the kind of sandwich that feels special while being incredibly easy to assemble. Everything can be prepared ahead of time, making it perfect for entertaining, road trips, picnics, and casual summer weekends.

One of my favorite things about this sandwich is how beautiful it looks when sliced and served. The colorful layers make it feel like something you'd find at a neighborhood Italian deli, yet it comes together with simple ingredients from the grocery store.

Around here, summer isn't just a season—it's a collection of beach days, backyard dinners, poolside afternoons, and impromptu gatherings with friends. Having a few reliable recipes that can feed a crowd without heating up the kitchen makes those moments even easier to enjoy.

Enjoy!


-- Ingredients

  • A large bakery-style French loaf or Italian loaf - Choose a sturdy loaf that can hold generous layers of fillings without becoming soggy.
  • olive oil
  • garlic cloves
  • deli meats - cotto or hard salami, mortadella, sliced turkey breast, and slice chicken breast
  • fresh mozzarella
  • fresh basil leaves
  • Roma tomatoes
  • marinated artichoke hearts
  • fresh spinach leaves
  • red onion
  • seasonings - kosher salt, freshly ground black pepper, and Italian seasoning


-- Equipment

  • Serrated bread knife
  • Cutting board
  • Small mixing bowl
  • Pastry brush
  • Measuring spoons
  • Serving platter


My Go-To's

Serrated Bread Knife - A quality bread knife makes slicing the loaf cleanly and helps preserve all those beautiful layers.

Large Wooden Cutting Board - Provides plenty of space for assembling and slicing the finished sandwich.

Serving Platter (wood or porcelain) - A large platter makes this sandwich look party-ready the moment it hits the table.


-- Let's Make It Together

Slice the loaf horizontally and gently remove some of the soft interior bread from both halves.

Stir together the olive oil and garlic, then brush the mixture over the cut sides of the bread. Sprinkle with Italian seasoning.

Layer half of the salami, mozzarella, basil, tomatoes, mortadella, artichokes, spinach, turkey, onion, and chicken on the bottom half of the loaf. Repeat the layers once more.

Season lightly with salt and pepper, then place the top half of the bread over the fillings.

Slice into wedges and serve immediately, or wrap and refrigerate until ready to serve.


-- Perfecting the Cooking Process

Because there is no cooking involved, ingredient quality really matters here. Fresh mozzarella, ripe tomatoes, and good-quality deli meats will make a noticeable difference. If making the sandwich ahead of time, place the greens between the tomatoes and bread to help prevent excess moisture from soaking into the loaf.


-- Add Your Touch

One of the reasons I return to this sandwich all summer long is how easy it is to adapt for different occasions. Whether you're packing lunch for a day at the beach or lake, feeding friends at a backyard gathering, or preparing food for a road trip, this recipe can be customized to fit the moment.

  • Add roasted red peppers
  • Swap spinach for arugula
  • Use provolone instead of mozzarella
  • Add pepperoncini for extra zing
  • Include prosciutto for a more traditional Italian deli flavor
  • Press the sandwich for 30 minutes before serving for a classic deli-style presentation


-- Set the Mood 

Part of the joy of cooking is creating a little moment around the meal. Here are a few simple ways to set the mood when serving this dish.


This Italian Picnic Sandwich for a Crowd is one of my favorite ways to feed people during the summer without turning on the oven. Whether we're headed to the beach, packing for a road trip, go to a concert in the park, or hosting friends in the backyard, it's the kind of recipe that makes entertaining feel effortless.

If you're planning summer gatherings, you may also enjoy my Mixed Berry Galette with Lemon & Vanilla, Sheet Pan Burrata Gnocchi with Roasted Peppers & Basil, Eggplant & Chicken Sandwiches, and Creamy Coconut Fruit Dip. Together, they make a wonderful collection of warm-weather recipes perfect for sharing with family and friends.

Whether you're headed to the beach, the park, or your own backyard, I hope this sandwich finds its way into your summer plans.


Before You Start

What occasions is this sandwich best for?
This sandwich is perfect for picnics, beach days, pool parties, road trips, concerts in the park, tailgates, and casual summer entertaining.

Can I make this ahead of time?
Yes. It can be assembled several hours ahead and refrigerated until serving.

Can I press the sandwich?
Absolutely. Wrapping and lightly pressing the sandwich creates a more traditional deli-style picnic sandwich.

What bread works best?
A sturdy bakery-style French loaf or Italian loaf works best.

Can I customize the meats?
Yes. Use your favorite deli meats or whatever you have available.

How long will leftovers keep?
Store covered in the refrigerator for up to 2 days.

Can I serve this for a party?
Definitely. It's ideal for feeding a group and works well on buffet tables.


Tuesday, November 4, 2025

5-Ingredient Caesar Pasta Salad (Ready in 30 Minutes!)


This 5-Ingredient Caesar Pasta Salad comes together in just 30 minutes! With the help of a simple Caesar salad kit, tender pasta, and savory salami, it’s an easy, satisfying weeknight meal that tastes like a deli favorite — without the extra work.


5-Ingredient Caesar Pasta Salad (Ready in 30 Minutes!)


I’m bringing you another 5-Ingredient Meal! My last post — 5-Ingredient Steak Salad with Avocado — was such a time-saver for busy weeknights that I couldn’t wait to share another easy recipe in the series.

This 5-Ingredient Caesar Pasta Salad might just be even easier. It starts with a simple Caesar salad kit and turns into something that tastes like you put in way more effort than you actually did. A handful of ingredients — tender mini farfalle, sliced salami, a few pepperoncini, and some red onion — give it a hearty, deli-style twist that’s ready in just about 30 minutes.

It’s the kind of dinner that checks every box: quick, satisfying, and loaded with flavor. Whether you’re too tired to cook after work or just need something you can toss together without thinking too hard, this pasta salad is a total win for busy nights.

Enjoy!


What Ingredients Do I Need?

You’ll only need five simple ingredients for this Caesar-inspired pasta salad — most of which you probably already have on hand. It’s the perfect mix of convenience and flavor.

  • Mini Farfalle Pasta – These little bowties hold the creamy Caesar dressing beautifully, giving every bite a perfect balance of texture and flavor. Any short pasta shape will work in a pinch — think rotini or penne.
  • Caesar Salad Kit – The ultimate shortcut! It includes the greens, dressing, croutons, and Parmesan — everything you need to build a classic Caesar base with almost no prep.
  • Sliced Salami – Adds savory, salty richness that makes this salad feel hearty and satisfying. Use a good-quality Italian salami for the best flavor.
  • Pepperoncini Peppers – Bright, tangy, and just a touch spicy, these bring a pop of contrast that cuts through the creamy dressing.
  • Red Onion – Thinly sliced for a mild bite and beautiful color — it ties everything together and gives the salad a little extra crunch.


Substitutions & Variations

Want to mix things up? This recipe is incredibly adaptable — here are a few ways to change the flavor profile or use what you already have.

Substitutions - Simple Swaps

  • Pasta: Any small shape will do — rotini, penne, or even elbow macaroni.
  • Protein: Swap the salami for grilled chicken, diced turkey, pepperoni, or even chickpeas for a lighter, meat-free version.
  • Cheese: Add a sprinkle of fresh shaved Parmesan or even a touch of feta for an extra burst of flavor.


Variations

1: Chicken Caesar Twist

Add grilled chicken (or rotisserie chicken) in place of the salami and toss in a handful of cherry tomatoes for color and sweetness. It’s fresh, filling, and meal-prep friendly.

2: Italian Deli Style

Use an Italian-style salad kit instead of Caesar and add a handful of olives or roasted red peppers. The flavors are bolder and perfect for a picnic or make-ahead lunch.


Kitchen Tips & Notes

  • Chill the pasta – Rinse your cooked pasta in cold water after draining to stop the cooking process and keep it from getting too soft.
  • Toss just before serving – Mixing the dressing and toppings right before serving keeps the greens crisp and the textures balanced.
  • Make it ahead – You can prep the pasta, chop the onion, and slice the salami earlier in the day. Wait to add the dressing and toppings until ready to eat for the best texture.
  • Garnish Twist – Take the croutons from the salad kit and crush them up and mix them with the Parmesan cheese from the kit.  Sprinkle that on top of your pasta salad before serving.
  • Upgrade the kit – Salad kits are an amazing shortcut, but don’t be afraid to enhance them — a drizzle of olive oil or a squeeze of lemon juice brightens everything up.


HUNGRY FOR MORE? Subscribe to emails at the top of this page and follow along on Facebook,  and Pinterest for all of the latest updates.


    RECIPE IS DOWN BELOW👇     


Tuesday, July 1, 2025

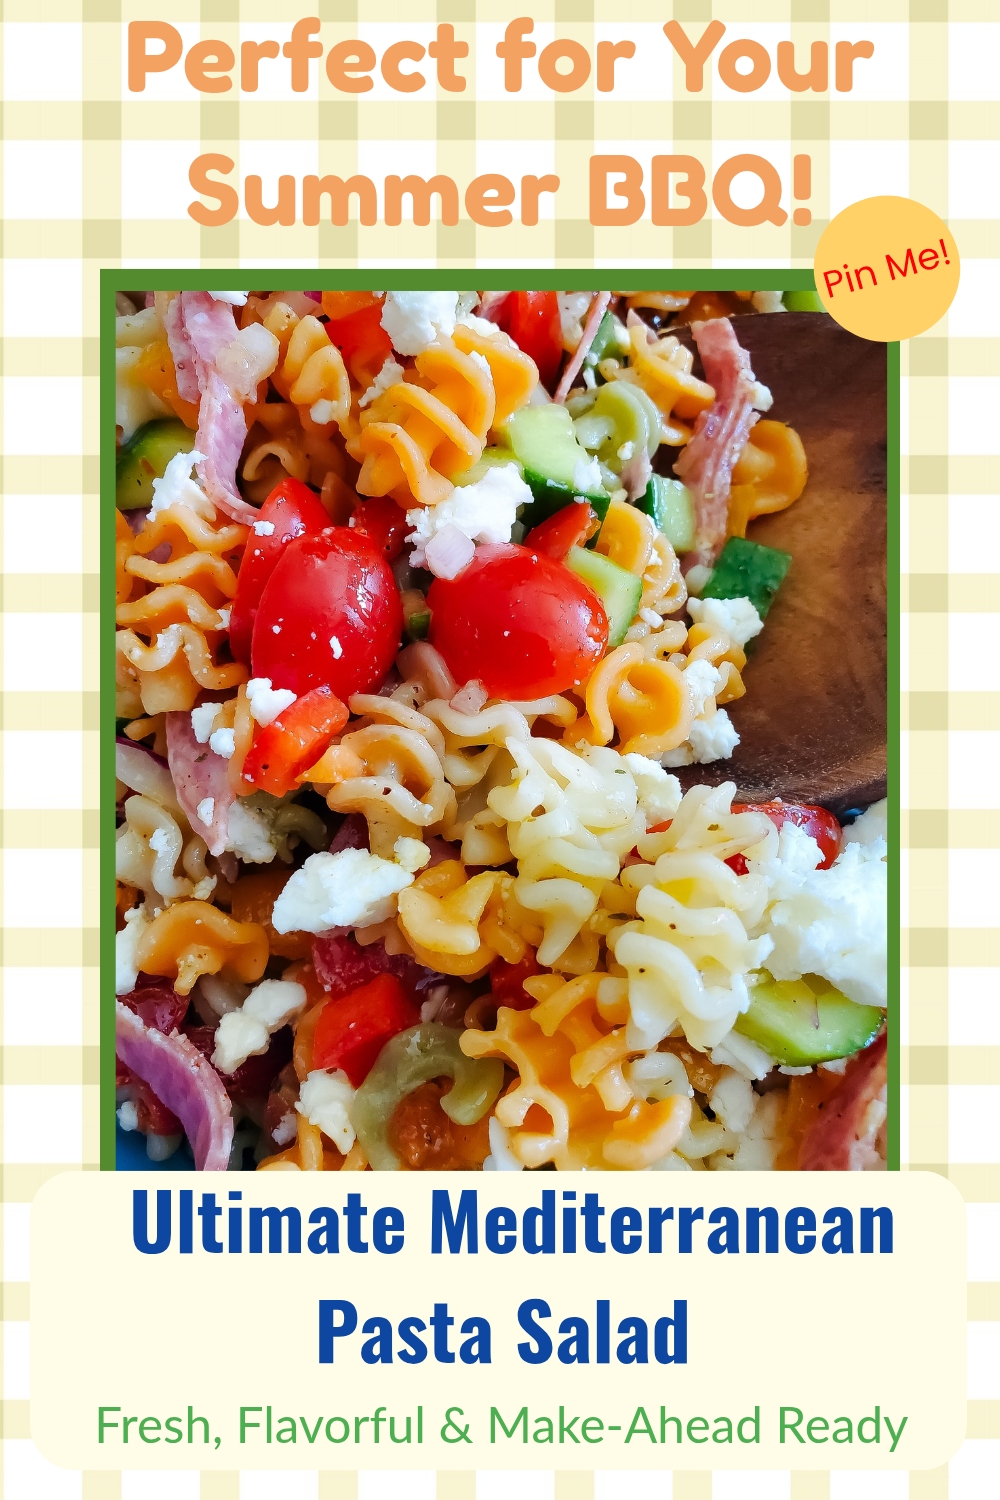
Ultimate Mediterranean Pasta Salad – Easy Side Dish for BBQs & 4th of July

This Ultimate Mediterranean Pasta Salad is the perfect easy make-ahead side dish for BBQs, potlucks, and 4th of July celebrations—fresh, zesty & crowd-pleasing!


Ultimate Mediterranean Pasta Salad – Easy Side Dish for BBQs & 4th of July


Every year, as the 4th of July rolls around, I find myself reaching for recipes that are bright, bold, and built for sharing. You know the ones—dishes that hold their own at the cookout table, that can chill in the fridge while you chase sparklers or man the grill, and still wow everyone when it’s time to eat. This Ultimate Mediterranean Pasta Salad is that dish.

It’s become my go-to for summer gatherings: a colorful, crave-worthy mix of tender rotini, juicy tomatoes, crunchy cucumbers, sweet peppers, and salty bites of feta and salami. But what really ties it together? A zesty lemon-herb dressing with a touch of honey, sumac, and paprika—it’s bold, tangy, and completely irresistible. Whether you're heading to a 4th of July potluck, planning a backyard BBQ, or just want a make-ahead meal that brings the sunshine, this pasta salad checks every box.

Enjoy!


What Ingredients do I need?


Pantry/Dry Goods

Deli/Cheese
  • Feta cheese (crumbled)
  • Beef Genoa salami (sliced or stick-style)

Produce
  • Cherry or grape tomatoes
  • Persian cucumbers
  • Orange bell pepper
  • Red bell pepper
  • Small red onion
  • Fresh basil
  • Lemons (for juice and zest)


Substitutions and Variations

Substitutions

  • Pasta:  Instead of rotini: Fusilli, penne, farfalle, or cavatappi
  • Cherry or Grape Tomatoes:  Chopped Roma or vine tomatoes (remove excess juice/seeds)
  • Persian Cucumbers:  English cucumber (peeled if preferred) or regular cucumber (remove seeds)
  • Orange & Red Bell Peppers:  Any bell pepper color or use roasted red peppers for a smoky flavor
  • Red Onion:  Shallots (milder) or sweet yellow onion (thinly sliced)


Variations

  • Vegetarian Delight:  Omit the salami and add chickpeas or white beans for protein.  Toss in kalamata or green olives for a salty punch.
  • Herb Garden Twist:  Swap basil with a mix of mint, parsley, and dill for a fresh, herby take.  Add a sprinkle of lemon zest just before serving for brightness.
  • Grain Swap:  Swap pasta with orzo, couscous, quinoa, or farro for a different texture or a gluten-free option.


Kitchen Tips and Notes

  • Cook pasta just to al dente: Slightly firm pasta holds up better once chilled and tossed in dressing—no mushy bites here!
  • Use the good olive oil: Since the dressing is raw and lemon-forward, a high-quality extra virgin olive oil makes a big difference in flavor.
  • Toss dressing just before serving (if prepping ahead): This keeps the salad vibrant and prevents sogginess. Or reserve a few spoonfuls to refresh the salad right before serving.
  • Double the dressing: It keeps well in the fridge for up to a week and tastes great drizzled on grilled chicken, veggies, or even grain bowls.

  • Store in an airtight container in the fridge for up to 3–4 days. The flavors will deepen as it rests!

  • Freshen it up before serving: Pasta can absorb dressing as it sits, so revive it with a splash of olive oil, lemon juice, or a spoonful of leftover dressing.


🔥BBQ Hosting Tips – Stress-Free, Crowd-Pleasing, and Fun

Throwing a backyard BBQ doesn’t have to mean sweating over the grill all day or scrambling at the last minute. With a little prep and a few smart hosting tricks, you can enjoy the party right along with your guests. Here are some of my go-to tips for effortless and memorable summer gatherings:

1. Prep Sides the Day Before:  Make-ahead dishes (like this Mediterranean pasta salad!) are lifesavers. Cold salads, dips, and marinated veggies can all be prepped a day in advance, saving you time and fridge space on party day.

2. Keep Drinks Cold & Easy to Grab:  Fill a cooler or drink tub with ice and stock it with sparkling water, lemonade, sodas, and maybe a signature mocktail or punch. Label it clearly and station it away from the cooking zone to avoid crowding the grill.

3. Plan a Simple, Grilled Main Dish:  You don’t need five kinds of meat. Choose 1–2 main proteins—like burgers and chicken—or go plant-based with grilled veggie skewers or portobello mushrooms. Simpler menus = happier hosts.

4. Create a Serve-Yourself Station:  Set up a buffet-style layout where guests can build their own plates. Include condiments, toppings, utensils, and napkins in one place so people don’t have to ask (or interrupt you) mid-flip.

5. Add Ambience with Music & Lighting:  A fun playlist and a few strings of patio lights or lanterns can instantly elevate the atmosphere. Bonus: citronella candles or herbs like rosemary and mint can help keep bugs at bay while setting the mood.

6. Prep for Clean-Up Ahead of Time:  Place labeled bins for recycling, and trash where guests can find them easily. Keep a stash of wet wipes and paper towels nearby—you’ll thank yourself later.

Bonus: Don’t Try to Do It All:  Let guests bring drinks, dessert, or chips. Most people want to help, and it makes the party feel more relaxed and communal.


HUNGRY FOR MORE? Subscribe to emails at the top of this page and follow along on Facebook,  and Pinterest for all of the latest updates.


LinkWithin

Related Posts Plugin for WordPress, Blogger...