Pages

Tuesday, October 30, 2012

Autumn Dishes

Need some quick ideas for Halloween tomorrow?

Today's post is all about having some seasonal fun and enjoying the holiday.


Halloween if one of my favorite holidays, the costumes, the scary stories, eerie movies, and the fun of trick or treating!

These days there isn't any trick or treating....unless you call eating a form of treating!  We like to stay home all cozy and have a nice autumn meal.

Browse through some of my favorites and try a few!


A wonderful snack for the kiddies and the kiddies at heart!  Take some to work to share.

A hearty stew full of savory pumpkin flavor. Your family will love you!

A light salad full of autumn flavors!

a light dessert

Nice, warm and hearty!

and last but NOT LEAST

Great for dessert, or breakfast!

Have a Happy and "safe" Halloween!

Sunday, October 28, 2012

Southern Sundays


Southern Sundays is back!

I've been out celebrating our 12 year Anniversary and wasn't around to host Southern Sundays last week.
So Sorry...

But, I'm back now.

Time to bring your best dishes and join the party.  It's almost Halloween time!
Can't wait to see all your creative goodies.

Before we start, here are some cute Halloween decor pics to take a look at.  These were taken at Disneyland.  They are having their annual Halloween Time and since this is a favorite holiday of mine we decided to take advantage of the season and make this one of our anniversay celebration days.


I especially like the Tinkerbell pumpkin carving.  So adorable!


On to the party.  At the last party we had two wonderful dishes that everyone enjoyed.  Congratulations to our two creative cooks on your featured dish.

by Call Me PMc
Yum Yum!

and
by With A Blast
Heavenly!

Both of these wonderful dishes have been pinned on Pinterest!

Ready to party?

Couple of reminders to make the most of your posts.  ** Make sure to tell all your friends so they can join the party as well!  **Please make sure to visit 1 or 2 other posts to share your compliments and enjoy their dishes as well!

Guidelines:
Please become a follower by joining my site with Google Friends Connect in the right side bar.
Link back to your specific recipe and not to your main site.
Link back to Southern Sundays either in your post, or grab my Southern Sundays Button located in the right side bar.
Please visit a few of the links in the post and say hello to your fellow bloggers!
Enjoy, have fun, cook lots of food, and relish your Southern Sunday!


Saturday, October 27, 2012

Pear and Gorgonzola Salad


The other day I was shopping at Trader Joe's.  Don't you just love that store?  If you've never been and have one in the neighborhood high tail it right over there and take a look at all the fabulous food they have.

One of my favorite items there is a Pear and Gorgonzola salad that I grab at lunch time.  this salad has just the right balance of sweet and salty/tart.  The cheese goes perfectly with the mild sweetness of the pears. I'm just in love with this salad.

I recall MGG and I have a good version of this salad down on Coronado Island, San Diego last spring.

Here is it.


So when I saw some beautiful fresh pears at the store the other day I decided to make my own version of this delicious salad.


Easy to make with a few ingredients.  I added come toasted walnuts, a little Gorgonzola and pears, all served over some green leaf lettuce.  Add a olive oil dressing and you are set!

Try this wonderful salad.  It's easy to make, perfect with the ripe pears right now, and tastes fabulous!


Pear and Gorgonzola Salad

Serves 4

4 c Green leaf lettuce, torn
2 pears, cored and sliced
1/3 c walnuts, toasted
1/3 c Gorgonzola crumbled
Olive oil vinaigrette (I used Newman’s)

Directions:
Wash and dry your lettuce, tearing into bite sized pieces.  In a skillet over low heat add your walnuts, and toast for 3 min. 

In a large bowl add your lettuce, pears, walnuts, and Gorgonzola.
Toss with a light amount of salad dressing.  Serve.

Friday, October 26, 2012

Autumn recipes from Williams-Sonoma


Images and/or other value provided by our partner, Williams-Sonoma.


I wanted to share some great recipes with you that are perfect for this time of year.

They come from one of my favorite stores, Williams-Sonoma.  Their store is full of items you dream about and their food is top notch.

I think you will enjoy these.

Braised Beef with Autumn Vegetables  (click for the recipe)


Images and/or other value provided by our partner, Williams-Sonoma.


Images and/or other value provided by our partner, Williams-Sonoma.

Enjoy the Autumn!

Thursday, October 25, 2012

Grilled Teriyaki Steaks with Peppers and Mushrooms


It's funny where you get inspiration from, or what may trigger and old memory.

The other day MGG and I were driving around enjoying the nice weather and the pretty scenery.  We often like to drive along the coastline from Santa Monica up to Malibu, have a little coffee or a snack, maybe dinner, and then head home.

On this day there happened to be a LOT of "traffic" on PCH (Pacific Coast Highway).  I mean we were stopped and not moving.  Okay a little exaggeration, we were moving...slowly.  Not enough to catch the wind in your hair!  So I happened to look over and saw the Chart House restaurant.  A beautiful restaurant, all dark and moody inside, right above the water.  Very romantic.


Well, it brought back so many memories.  I used to celebrate my birthday there each year with my parents when I was in my teens.  I used to always get Teriyaki Steak and a virgin Pina Colada.  YUM!  I was in paradise, my own private Hawaii!  Later this restaurant became a go to place for special occasions.  We don't tend to go much any more.  I think MGG and I have only gone there once or twice.  (Note to self:  go to dinner at the Chart House!)

So I started longing for Teriyaki Steak and decided to pick up some NY strips steaks at the store and make my version of their wonderful dish at home.


I took a short cut by using a low sodium bottled Teriyaki sauce from Kikkoman's line. (Sorry, I do have a good homemade recipe but sometimes time is a consideration!)  It's nice and thick.  The one thing with Teriyaki sauce is you have to be careful and baste it on the steaks toward the end.  The high sugar content will have a tendency to burn on your food quickly.  If you do use it as a marinade, choose thin cuts of meat that don't require long cooking times.

I added red bell peppers and mushrooms as a topping to our dish.  MGG loves the veggies and it's a great way to get more in your diet.  This can be whipped up in under 30 minutes.  It's a great family dinner, special occasion, company's coming or weeknight treat.


So I must say, my steaks were fabulous!  I'm just a home cook, but they were darn good!  One bite and I was right back at the Chart House, 18 years old, having dinner.  Only thing missing was the Pina Colada!

Enjoy!

Grilled Teriyaki Steaks with Peppers and Mushrooms

serves 4

4 boneless New York strip steaks (1 inch thick)
Canola oil
3/4 cup low sodium teriyaki marinade and sauce (Such as Kikkoman)
2 tablespoons butter
10 ounces fresh mushrooms, sliced
1 large red or yellow bell pepper, cut into thin strips
 

Allow steaks to come to room temperature. Heat grill or grill pan to medium high.

Oil your grate or the indoor grill pan with canola oil. Allow to heat up. Cook steaks, turning once, about 15 minutes for medium doneness, or until your preferred temperature. Baste with teriyaki sauce during the last 5 minutes of cooking to avoid burning. Place steaks on a cutting board tented with foil to rest.

Meanwhile in a skillet, melt butter over medium heat. Add mushrooms and cook until golden brown. Add peppers and cook another 5 minutes until crisp tender. Add remaining teriyaki sauce to the skillet and stir to combine, cook 1 minute until sauce is heated through.  Plate steaks and spoon mushrooms and peppers with sauce over the steaks.

Tuesday, October 23, 2012

Roasted Baby Gold Potatoes with Arugula


Simple sides...

That's what this post is about.  Need a new side dish?  Stuck on the usual ones?  Well, everyone loves potatoes so why not serve them in a new way.


This potato side is simple to make.  The oven does all the work, and with the addition of arugula you get some added greens.  Plus it tastes fabulous!


The nice little dressing give it a little zip, so make sure not to skip that part.  

One try of these potatoes and they may become your new "go-to" dish!

Roasted Baby Gold Potatoes with Arugula 


serves 4

1 lb baby gold potatoes, halved
1 T olive oil
1 T minced garlic
salt & pepper
1 - 1 1/2 c arugula, loosely packed
1 T lemon juice
1 T olive oil

Preheat oven to 450 degrees.  Line a cookie sheet with parchment paper and set aside.

In a bowl toss potatoes with oil, garlic, salt & pepper.  Spread out in a flat layer on the cookie sheet making sure they are cut side down.  Bake 15-20 minutes or until golden brown.

Remove from oven and place back in the large bowl.  Immediately stir in the arugula and cover with plastic wrap.  Allow to steam 5 minutes to wilt the arugula.  Whisk together the lemon juice and the olive oil and toss with the potatoes.  Serve. 

Saturday, October 20, 2012

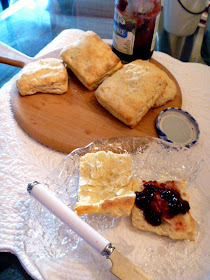
Old Fashioned Biscuits


I'm on the quest for the perfect biscuit!

Biscuits bring to mind farmhouses, pioneers, kitchens full of flour, big breakfasts, lots of family gathering around, and hot melted butter.  They also remind me of my mom's biscuits and gravy and my mom's Aunt Grace's kitchen back in Oklahoma.  Everyone trying to help with cooking, a kitchen crowded with people, and my Great Uncle Howard riding up on his horse to come to breakfast.  Such memories of country life for a child that grew up in the suburbs of Los Angeles.


So on my quest for the perfect biscuit I steal, (I'm mean write down) every old recipe my mom has every time I go visit her.  Not nearly done...cause she has sooo many!  This one I found tucked in a drawer paper clipped to a stack of special recipes.  She can't remember which relative these came from but knew they had been made many many times.


So I decided to make these today.  The key to these is baking powder.  A small amount of butter in these.    They are very easy to whip up and I had them in the oven in no time.  They were not the most moist biscuit, but they certainly would do in a pinch.  All in all a good standard biscuit.  I'm still on my quest.  One of my favorite's so far are these. 


Try some this weekend and give a taste test to these biscuits.  Old timer's swear by them (or at least my family tree did!)


Old Fashioned Biscuits

Makes 6 biscuits

1 1/2 c All Purpose Flour
½  t salt
1 ½ t baking powder
½ t sugar  
 

3 T butter
½ c milk

Preheat your oven to 425 degrees. 

Mix together the dry ingredients. Using a pastry blender or two knives cut in the butter until you have pea sized bits.  Add the liquid, mixing quickly and gently for about 20-30 seconds until you have a soft dough.
 

On a lightly floured board, pat dough into a rectangle about 3/4-inch in thickness.  Cut into squares using a knife or bench scraper.
 

Bake for 15 minutes, until golden brown.
 

Thursday, October 18, 2012

Creamy No Roux Stove Top Macaroni and Cheese


Craving pasta?

I do....often.  But, I haven't been eating as much pasta as I'd like lately.  I truly love the stuff, but watching the carbs calls for less pasta.  So sad.  But every once in a while I have to have some comforting pasta.

So I was surfing the net and I was on the www.theKitchn.com and ran across a  post for a dreamy looking pasta dish.  Do you know this site?  It's an excellent resource for recipes, how to's, and anything food related.  Go visit it you can!  So, I was surfing this site and came across a recipe for what they called Creamy No Roux Stove Top Macaroni and Cheese.  No roux? Really?  Peaked my interest, but they really had me at "stove top"!

So I decided I had to make this.  And I did.  


It was really easy to make.  Something you could do as a side dish during the week.  Or if you prefer along side your Sunday dinner.  Either way this lives up to it's name.  It's creamy...there really is 'no roux', and all is made simply on the stove top.  Doesn't get much better.


I already posted another Stove Top Macaroni & Cheese dish using King Arthur's Vermont Cheese Powder.  You can find that recipe here.  Honestly they are both good.  This one, of course, uses fresh shredded cheese and is slightly more involved, but the result is fabulous!
Try them both and see for yourself!

Creamy No Roux Stove Top Macaroni and Cheese
by the Kitchn

Serves 4 to 6  

What You Need

Ingredients

1 pound pasta, any shape
1 1/2 cups whole or 2% milk
2 tablespoons all-purpose flour
2-3 cups shredded cheese, like cheddar, monterey jack, or colby
1/2 teaspoon salt
1/4 teaspoon powdered mustard
Optional extras (cook before adding): Ham, bacon, onions, peas, mushrooms, peppers, broccoli, cauliflower

Equipment

Pasta pot
Sauce pan
Whisk
Spatula

Instructions

1. Boil the Pasta: Bring about 4 quarts of water to a boil over high heat in the pasta pot. Add the pasta and a tablespoon of salt. Cook until the pasta is al dente, about 8 minutes. Drain and set aside.

2. Warm the Milk: When the pasta has finished cooking, prepare the cheese sauce. Begin warming 1 cup of the milk in the saucepan over medium heat. Whisk together the remaining 1/2 cup of milk and the flour until there are no lumps. When you just start to see tendrils of steam rising from the warming milk, whisk in the milk-and-flour mixture. Continue whisking gently until the milk thickens slightly to the consistency of heavy cream, 3-4 minutes.

3. Make the Cheese Sauce: Turn the heat to low and begin mixing handfuls of cheese into the milk. Stir in the salt and mustard. Stir until all the cheese has melted and the sauce is creamy. Taste and adjust the seasonings as desired. Remove the sauce from heat.

4. Combine the Pasta and Cheese Sauce: In a large serving bowl, combine the pasta and 1/2 of the cheese sauce. Stir to coat the pasta evenly. Add the second half of the sauce and any extra add-ins.

5. Serving and Storing Leftovers: Serve the mac and cheese immediately while still warm. Leftovers will keep for up to a week and can be reheated in the microwave. If the sauce is a little dry after re-heating, mix in a splash of milk to make it creamy again.

Additional Notes:
• Baked Mac and Cheese: If you have a little extra time, you can bake the macaroni and cheese to give it a golden crust. Pour the prepared mac and cheese into a casserole dish, cover with a lid or foil, and bake at 350°F for 1/2 hour. Remove the covering, sprinkle with breadcrumbs and a few pats of butter, and bake uncovered for another 15-20 minutes until the top is golden and the interior is bubbly.


Tuesday, October 16, 2012

Chicken Lettuce Wraps


Need another quick weeknight dinner?

Today's recipe is perfect for that.  Done in under 30 minutes this dish will please the whole family.  MGG and I used to go to a lot of Chinese restaurants and I always loved getting the lettuce wraps.  Cool crisp lettuce against a hot spicy chicken.  YUM!  I would always order these and we would fight over the last piece of lettuce!  I've actually made a version of these lettuce cups with turkey that you may love.  You can find that recipe here.


Now we seem to be going to a lot of Thai restaurants.  They've been the new "in" thing.  They too have a version of lettuce wraps, but they are different.  Light...more citrusy, very fragrant with Thai flavors of mint and cilantro. They just burst with flavor!  I had to learn to make this version.  So when I was thumbing through a Cuisine at Home magazine I spotted a similar version.  So here's my adaptation of their Chicken Lettuce Wraps.  


So light, and the flavors will just rock in your mouth.  These are filling enough to have for dinner.  Serve with a nice fruit salad and you are set!  Quick to throw together for a weeknight meal, and make sure to save some for lunch the next day!  This will be a definite "go to" recipe!


Chicken Lettuce Wraps

Serves 4

1 T canola oil
1 T minced ginger
1 T minced garlic
1 lb. ground chicken
¼ c fresh lime juice
1 T soy sauce
2 t brown sugar
2 t chili garlic sauce
½ c red onion, minced
½ c cilantro, chopped
½ c mint, chopped
Lemon zest
Boston, Bibb or Romaine lettuce leaves

Toppings:
Cilantro and mint leaves (optional)
Dry roasted peanuts

Heat oil in a nonstick skillet over medium-high heat.   Add ginger and garlic and cook for 30 seconds.  Add chicken and cook, breaking up into small pieces, about 10 minutes or until cooked through. 

Meanwhile in a small bowl stir together lime juice, soy sauce, brown sugar, and chili garlic sauce.  Add to chicken and cook until liquid has evaporated approx 4 minutes.  

Stir in red onion.  Remove from heat and add cilantro and mint.  Stir to combine.  Sprinkle on lemon zest. 

Serve chicken in lettuce leaves, topping with cilantro and mint if desired, and peanuts. 

Adapted from Cuisine at Home July/August 2012


Sunday, October 14, 2012

Southern Sundays


Welcome to Southern Sundays!

Well it's felt like fall around here all week long.  We even had a storm or two roll through.
And then I gave in...


I forgot all about long summer nights...I was longing for fall

longing for comfort food!

So I've been busy this weekend trying out some new dishes, and a few family favorites that remind me of fall. I can't wait to bring them to you!  How does Apple Crisp sound?  or, a lightened version of Chicken Saltimboca, or Italian Chicken and Bean Soup?  Exciting huh! So stay tuned for those excellent dishes.  They will warm your heart...and your soul.

But, there was some relaxing time too.
Driving by the coast this weekend.  Just look at the view!


Remember to take time to take in the beauty around you!

On to last week's party!  What fun...so many exciting dishes to see.  I wanted to eat them all!

Congratulations to our Featured Dish!

Photobucket

by Call Me PMc
HEAVEN!

So let's party!  I can't wait to see what you all bring this week.  Make sure to tell all your friends so they can join the party as well!

Guidelines:
Please become a follower by joining my site with Google Friends Connect in the right side bar.
Link back to your specific recipe and not to your main site.
Link back to Southern Sundays either in your post, or grab my Southern Sundays Button located in the right side bar.
Please visit a few of the links in the post and say hello to your fellow bloggers!
Enjoy, have fun, cook lots of food, and relish your Southern Sunday!

Thursday, October 11, 2012

Nutella French Toast


I was bad.

I'm sorry, I couldn't help myself.  I promise to do better, really I do.  But I was overcome with a craving for chocolate.  Do you ever get that?

I think us women know about chocolate cravings.  There's something about it...it's creamy smoothness when it hits the tongue.  Melting in your mouth and the warm sensation that follows.  Oh my!  


So I had this craving the other night and it wouldn't stop...I had to have some chocolate.  All I had in the house was a jar of Nutella, cause I don't really keep chocolate in the house.  Plus, I was craving warm....melted chocolate.  You know the kind...like a hot baked chocolate chip cookie with the chips all melty and good.

So I decided to be very, very bad...I was going to make French Toast.  Late at night.
Not just any french toast.  Stuffed...with Nutella. AND made with half and half...cause that was all I had.  (I tried to make them seem less self indulgent by cutting them into cute little triangle sandwiches...cute..but I think I'm fooling myself)


And I did...and I ate it all...and it was GOOD!

No regrets.  Maybe tomorrow though.  I'm sure I'll get over it.

So if you are craving chocolate, and I know you are, try this french toast.  It's killer!

Nutella French Toast

serves 4 (2 triangles each)

4 slices of day old white sandwich bread
2 eggs
1 T splenda
1/2 c half and half
1 t vanilla
2 T butter
Nutella (about 1/4 cup)
Confectioner's sugar (if desired)

Slice each bread into 4 triangles, cutting diagonally.  

In a bowl whisk together eggs, Splenda, half and half and vanilla.  Dip the bread pieces on the bowl, dipping them down to ensure they are soaked.  

In a skillet over medium heat add 1 T of butter and allow to melt.  Add half the bread pieces to the skillet and allow to cook about 2 minutes, or until browned.  Turn over and cook the other side another 1-2 minutes.  Transfer to a plate and cook the remaining batch of french toast.  

Meanwhile add a dollop of Nutella to 4 of the cooked bread triangles, and top with another bread triangle   Remove the second batch from the skillet and continue to coat with Nutella making the remaining sandwiches.  Sprinkle with confectioner's sugar if desired and serve immediately.


Tuesday, October 9, 2012

Big Batch Marinara Sauce


I love pasta!

I'm sure there isn't anyone out there that doesn't love a good pasta dish.  It's fabulous comfort food.  A good pasta deserves a good sauce.  My ultimate favorite sauce is a red sauce.  I usually make a family favorite recipe for a meat filled spaghetti sauce, but a traditional marinara is versatile and tastes wonderful.

You can take a basic marinara sauce and turn it into so many dishes.  Use it with meatballs, as a spaghetti sauce, pizza sauce, dipping sauce, and over chicken.  The possibilities are endless.  So having a nice homemade sauce on hand is heaven sent.

A trip to my local farmer's market brought me to a bumper crop of end of summer tomatoes.  Beautiful Roma tomatoes!  So I bought as many as MGG and I could carry, which was around 18 lbs. and off I went to make up a BIG batch of marinara sauce.  


I chose to freeze my sauce in 2 cup jars (pints) which gives me a good portion size. You can chose to do a canning process if you prefer, but I have more freezer space than shelf space at this point.  I can't wait to open a jar in the dead of winter and taste the fresh tomatoes...woohoo!

Kitchen Tip:  Blanching Tomatoes
Bring a large saucepan fi lled two-thirds full with water to a boil over high heat. Wash the
tomatoes and cut an X in the bottom of each tomato (opposite the stem side). Working in small
batches, immerse the tomatoes in boiling water for 30 to 60 seconds, until the skin starts to
curl. Using a skimmer, immediately remove the tomatoes from the boiling water and plunge
them into a large ice bath (half ice and half water). Remove them from the ice water and the
skins should easily slip off.

Big Batch Marinara Sauce

makes 6-8 pints

15 lb. ripe Italian plum tomatoes, blanched and peeled
4 T fresh thyme, chopped
½ c fresh basil, chopped
Salt and freshly ground pepper, to taste

Place the blanched tomatoes in a food processor.  Pulse until desired consistency is achieved.  Place the tomatoes, and juice, in a large heavy-bottomed pot. Add herbs and season with salt and pepper. Set over medium-high heat and bring to a boil.

Reduce the heat to low and simmer very gently, stirring ocassionally with a wooden spoon, 1 hour.

Meanwhile, wash 6 to 8 pint canning jars with their lids and rings in hot soapy water and rinse
them well. 

Fill jars using a funnel to pour about 1 cup of the hot sauce into each jar, leaving about ½   inch of headspace.  Wipe the rims clean.   Place the lid on each jar, then screw on the rings.   Allow jars to cool for several hours and then freeze.  Marinara will keep 6 months.

Sunday, October 7, 2012

Southern Sundays


Welcome to Southern Sundays!

Here are some beautiful shots around town to soothe your soul.


Remember to look for the beauty around you!

Last week's party was filled with great dishes.  One dish stood out....way out from the crowd

Congratulations on being this week's featured dish!


by Katie Kate's Kitchen

So let's party!  I can't wait to see what you all bring this week.  Make sure to tell all your friends so they can join the party as well!

Guidelines:
Please become a follower by joining my site with Google Friends Connect in the right side bar.
Link back to your specific recipe and not to your main site.
Link back to Southern Sundays either in your post, or grab my Southern Sundays Button located in the right side bar.
Please visit a few of the links in the post and say hello to your fellow bloggers!
Enjoy, have fun, cook lots of food, and relish your Southern Sunday!


Friday, October 5, 2012

Ham and Gruyere Omelet


We all know that breakfast is an important start to your day.

Sometimes, though we don't have enough time to cook something that may be a little too involved for breakfast.  I usually eat something quick on the go before work during the week.  On the weekends, I enjoy having a leisurely breakfast.  Maybe making some muffins, or biscuits and whatnot. It's my time to slow...down.   However, there are times even on the weekend when I need a quick start to my day.  Last weekend was a full weekend for me, working, cooking, cleaning, classes, and getting ready for company.  All added to up not much time for a relaxed breakfast.  

Omelets are a fast and easy dish that can be simple or hearty.  Just enough to fuel your body for hours to come.  Omelets cook up quickly and most likely you already have all the ingredients on hand.  What's better than that?  This is what I turn to when I need something substantial, but quick.  


Don't be afraid of an omelet...  They are rather quite simple, and very forgiving.  My motto is you can always turn them into a scramble if things don't work to your liking!

Most Omelets are traditional with a cheese filling, however, you can add just about anything to an omelet and turn it into a hearty meal.  I decided on sliced ham and Gruyere cheese. YUM!


Kitchen Tip:  There are two ways to fold an omelet.  You can do the more traditional way by folding it in thirds, like a letter.  Or choose the diner style, by folding it in half.  Your choice!  Just do what is easiest for you.  The trick to a tender Omelet is to cook it over medium heat.  Cooking eggs too fast can make them tough.


Here are some variations to try as well:  *Sauteed asparagus and Gruyere cheese.  * Caramelized onions, bacon or pancetta, and thyme.  *Spinach and mushrooms.  *Goat cheese, thyme, and shallots.

So the next time you are in a pinch for breakfast but want something more than a frozen waffle, try an Omelet!

Ham and Gruyere Omelet

serves 1

1/2 T butter
2 eggs
salt & pepper
splash of 2% milk
1/4 c shredded Gruyere
2 slices of deli ham, sliced into strips

Preheat an 8" skillet over medium heat.

Add butter to the skillet and allow to melt.  

In a small bowl whisk together eggs, salt & pepper, and a splash of milk (about 1- 2 T.).  Whisk until light and frothy.

Swirl melted butter around skillet covering bottom.  add eggs to the skillet and allow them to sit for 30-60 seconds.  Edges will begin to set.  Using a silicone spatula move one die of the egg to the center and tilt the skillet allowing the uncooked egg to flow to the bottom.  

Add the cheese and ham down the middle third, and allow to cook about 1 minute more.  Fold a third of the omelet over the filling.  Lifting the skillet, shake gently to move the omelet up on over the side of the skillet onto a serving plate, folding the last third at this point.  Serve immediately.